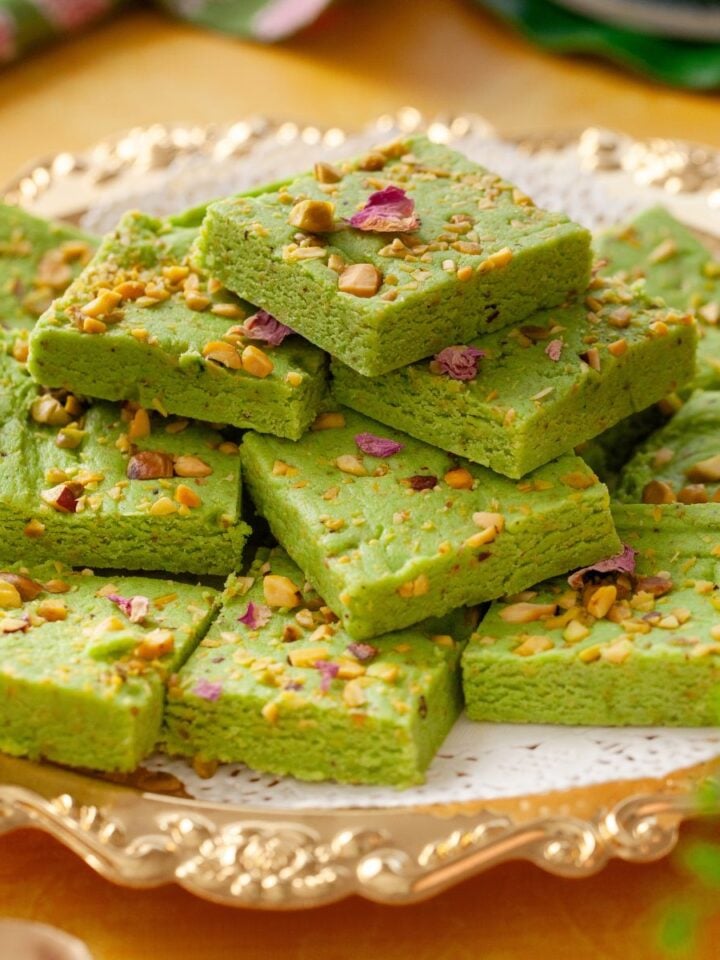
Kaju Katli is a traditional indian sweet (mithai) made with cashews. It has a melt in the mouth texture and you will need ground cashews, sugar and water for making these fudgy thins.
Kaju Katli isn't overly sweet and has a smooth and satisfying texture. It is a perfect dessert for any occasion or for Holi or Diwali gift boxes.

A note - I first published this post in October 2014, however in 2023 I updated the post with a few new pictures and more of what I have learnt about making kaju katli at home. That is why you will see a mix of old and new images.
I would lie if I told you that mom made Kaju katli at home.Never. She didn't need to because the streets of Delhi are dotted with amazing halwaiwallas (sweet shops) selling this lovely confection of cashews. Every festival came home boxes of kaju katli from our sweet shop and vanished in a matter of hours.
However, decent indian mithai where I live is a bit of a sob story. So, slowly I got into perfecting these mithai that I grew up eating.
About Kaju Katli
Kaju Katli is one of the most loved mithai by indians. It is super popular in north india on festivals like Diwali.
Kaju = Cashews, Katli = Thins. This popular mithai gets its name from the main ingredients and its unique shape and form. It has a mild sweet taste and pure taste of cashew. The nutty taste of cashew is the key in these thins.
To me kaju katli has always been something really exotic. Fudgy,nutty thins of ground cashews sweetened plainly with sugar, its one decadent confection.
A post about kaju katli would be incomplete if I do not mention that during festival time, it becomes quite expensive because cashews are a costly nut. Growing up, this was a treat on special occasions and not an everyday mithai.
However, the good thing is that when we make at home, just 1 cup of cashews powder yields a good quantity of katli so it is definitely a bit cost effective mithai to make at home.
The best part about traditional kaju katli is its signature cashew taste. I don't like to add any kind of flavor in my recipe however you could add rose water or green cardamom or saffron.
Making Indian Mithai
As a novice, in those initial years, I was very intimidated by the whole process of making mithai at home. It is pure art. But the good news is that it can be perfectedt through practice, effort and patience.
Like I mentioned before, I never saw kaju katli being made at home.
I had no recipe as a starting point I have had innumerable disasters and witnessed wastage of costly ingredients (not my favorite part at all!). However after many successful attempts, I can say that I have perfected it. I hope my recipe will help you to learn it faster than I did 🙂

Ingredients
You need 3 main ingredients for making kaju Katli.
- Raw Cashew - I prefer purchasing cashews pieces and halves because they are cheaper than the whole cashews. Anyways, we have to grind the cashews so it doesn't matter. Recently, in the past few years I have started buying fine raw cashew powder off Amazon and it works beautifully too.
- Sugar - Granulated
- Water
- Optional Ingredient #1 - Ghee. You might or might not need a teaspoon of ghee to moisten the surface on which you will roll the cashew dough.
- Optional Ingredint #2 - Warq or edible silver or gold foil. As you can see from my pictures, in my homemade kaju katli, I sometimes use it and sometimes don't. It is purely for aesthetics only.
How To Make Kaju Katli
Make the Cashew Powder
Use cashews at room temperature.
If you store your nuts in the fridge, take them out a night before and spread on the kitchen towel to air dry. The cashews should be at room temperature and completely dry before you start powdering them.
Cashews have a high fat content and if they are refrigerated or sweaty to begin with, they they will start clumping up and become pasty when we grind them. For kaju katli, we need cashew powder.
Place the cashews in a dry blender jar and in one go powder them as fine as you can. Do not overwork the blender. I scrape the side after a long go and thereafter pulse 2-3 times. We need a loose, smooth powder.
Sift the loose powder using a sieve.This way any pieces that did not grind will be separated. Dont try to grind what's left behind because it is a very small quantity and will need long grinding.
Pro Tip - I save the cashew pieces left behind and use them in future to make a wet cashew paste for recipes that need it.

Make The Fudgy Cashew Dough
In a wide, heavy bottomed pan combine the sugar and water. Set the pan on low flame and let the sugar dissolve.
Gently stir (I use my rubber spatula) the solution once. Keep flame on low and let the sugar dissolve. We are not looking for any string consistency.
Once the sugar has dissolved, add the powdered cashews. Mix everything and brace yourself for some hard work. Keep on stirring as the mix cooks on low flame.
In about 18 minutes, you will see that the mixture starts thickening and coming together.
Around 22 minutes, the mixture will start resembling a soft, sticky dough and will clump up around the spatula. If you try to bring the mixture together in one place, it will try to slowly spread. It took me exactly 24 minutes to reach that stage.
Pro Tip :- One way to check the texture of the dough is by rolling a ting ball from the dough. It should be soft and supple, not sticky.
Roll The Dough and Cut
Immediately transfer to a greased surface and leave to cool a bit until its safe to handle. Very gently knead the dough for 5-7 minutes to form a ball.
Pro Tip :-Do not press very hard as you knead else the cashews will start oozing their oil.
Flatten slightly. Place a parchment paper on top and using a rolling-pin, roll it out to a ⅓" thickness. Using a sharp knife (or a ravioli cutter, like I did), cut into diamonds.
Note :- Before cutting, stick the edible silver or gold foil on top if using.

Tips for Success
Cashew Powder
- Make sure that the cashew powder is fine and no bits of cashews are there. Sift the powder more than once if needed.
Sugar Syrup
- Dont thicken the sugar syrup. As soon as the sugar dissolves, add the cashew powder.
Cashew Dough
- Maintain a low heat during the entire process of cooking dough.
- It is the natural tendency of cashews to stick. Keep scraping and mixing back the sides for first 5-6 minutes however after that that the cashew dough sticking to the sides of the pan gets super dry so don't mix back.
- The cashew dough should be soft and clumpy around the spatula. It should not be sticky.
- Dont let the cashew dough turn cold- you wont be able to knead it. As soon as it is okay to touch while warm, start kneading it.
- Kneading the dough makes the texture of the tau katli soft. Dont skip this step else the kau katli won't form or they will be crumbly.
Recipe

Kaju Katli- Cashew Thins
Ingredients
- 1 +¾ cup raw cashew powder (220g) Made by grinding about 1.5 cup broken cashew pieces
- ¾ cup granulated sugar (150g)
- ⅓ cup water
- 1 tablespoon ghee
Instructions
Make Cashew Powder
- Use cashews at room temperature.If you store your nuts in the fridge, take them out a night before and spread on the kitchen towel to air dry. The cashews should be at room temperature and completely dry before you start powdering them.
- Cashews have a high fat content and if they are refrigerated or sweaty to begin with, they they will start clumping up and become pasty when we grind them. For kaju katli, we need cashew powder.Place the cashews in a dry blender jar and in one go powder them as fine as you can. Do not overwork the blender. I scrape the side after a long go and thereafter pulse 2-3 times. We need a loose, fine powder.
- Sift the loose powder using a sieve.This way any pieces that did not grind will be separated. Dont try to grind what's left behind because it is a very small quantity and will need long grinding. Pro Tip - I save the cashew pieces left behind and use them in future to make a wet cashew paste for recipes that need it.
Make The Cashew Dough
- In a wide, heavy bottomed pan (1 use 10 inch stainless steel pan) combine the sugar and water. Set the pan on low flame and let the sugar dissolve. You can use iron kadai or non stick pan as well.
- Gently stir (I use my rubber spatula) the solution once. Keep flame on low and let the sugar dissolve. We are not looking for any string consistency.
- Keep the stove on low. Once the sugar has dissolved, add the powdered cashews. Mix everything and brace yourself for some hard work. Keep on stirring as the mix cooks on low flame.
- In about 18 minutes, you will see that the mixture starts thickening and coming together.
- Around 22 minutes, the mixture will start resembling a soft, sticky dough and will clump up around the spatula. If you try to bring the mixture together in one place, it will try to slowly spread. It took me exactly 24 minutes to reach that stage. Pro Tip :- One way to check the texture of the dough is by rolling a ting ball from the dough. It should be soft and supple, not sticky.
Knead, Roll And Cut the Katli
- Immediately transfer to a greased surface and leave to cool a bit until its safe to handle. Very gently knead the dough for 5-7 minutes to form a ball.Pro Tip :-Do not press very hard as you knead else the cashews will start oozing their oil.
- Flatten slightly. Place a parchment paper on top and using a rolling-pin, roll it out to a ⅓" thickness. Using a sharp knife (or a ravioli cutter, like I did), cut into diamonds.Note :- Before cutting, stick the edible silver or gold foil on top if using.
- Serve or store in an air tight container for 5-6 days.


surabhi
very few ingredients and awesome result
Nishu
Hi Tanvi! Wishing you and your family a very Happy Diwali and a Prosperous new year! Discovered your blog couple of weeks back and I must say that photography is stunning. I am a food blogger and aspiring food photographer too. It makes me very proud as an Indian to come across blogs like Playful cooking, Cook republic, A brown table, Indian simmer and yours. You all are very talented and doing an excellent job 🙂