

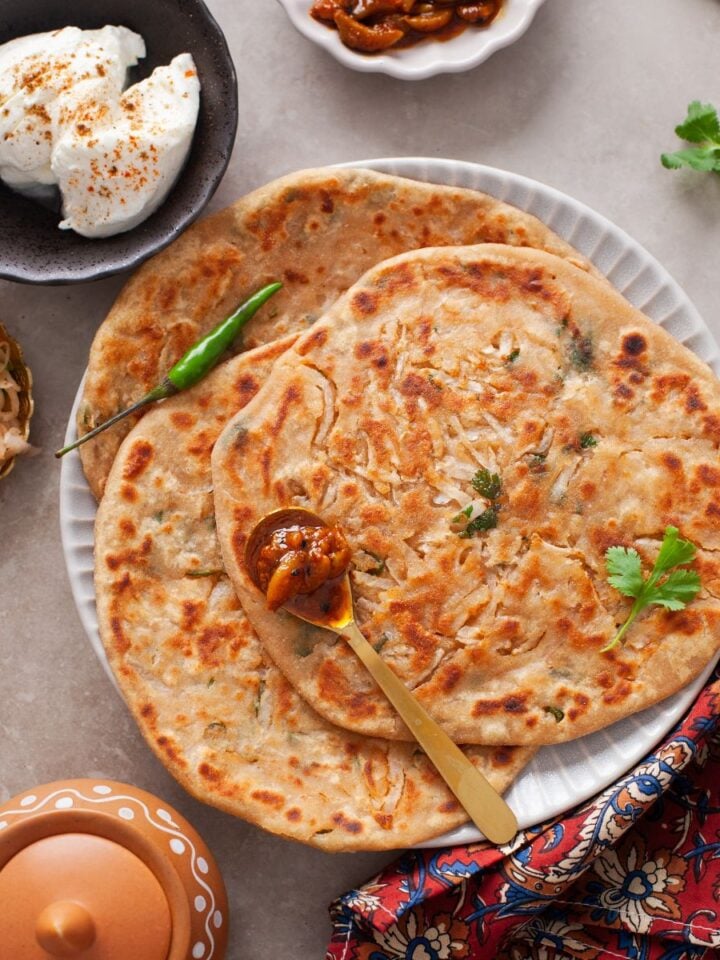
Methi puri or methi poori is a indian flatbread made with whole wheat flour, semolina, fresh methi (fenugreek leaves), garlic and spices. These puris are unique because you can serve them with curries like shahi paneer korma, aloo ki sabzi or khoya matar for a festive meal or make them smaller to serve with chai as a snack. Cool, right?
I love making these puri during festivals like Dusherra or Diwali that fall during the cold months when fresh methi is easily available.

Save The Recipe!
Puris, also know as poori are deep fried indian flatbreads. They are made using a variety of flours like whole wheat, gram flour, lentils, buckwheat as well as a ton of flavors like bedmi poori, kuttu poori or ajwain poori. Puris happen to be a favorite during festival time.
About Methi Puri Recipe
These methi puri are phenomenal in every way. Here are a few reasons why I like this recipe.
- Comforting. They are deep fried, of course!
- Are flavored with garlic & fresh methi, two of the most amazing ingredients.
- Due to combination of 3 flours- wheat flour, all purpose flour and semolina, these are crisp and have a perfect texture.
- Can be served as a snack (because they are khasta or crispy.
- Pair deliciously with curries and boondi raita (yogurt) for a full meal.
- With a little variation, these can be made ahead and stored for a week. Read later on how to do it.
- You can use use kasuri methi (dried fenugreek leaves) in case you don't get fresh methi. That means that you can make them year round.

Methi (Fenugreek Leaves)
Methi known as fenugreek in English is a leafy green available in the Indian subcontinent. The fresh fenugreek leaves have a pleasant bitter sweet nutty taste and a strong aroma. From methi seeds that are used for tempering to fresh methi leaves in making vegetarian & non vegetarian curries to as a dried herb, it is used in many ways across indian cuisine.
Where to Buy Methi in USA
You will find methi is most indian or pakistani grocery stores in the vegetable aisle. It is sold in bunches in farmers too. Look for fresh, dark green leaves with no spots or holes.
If you are unable to find, check the spice aisle and grab a box of kasuri methi which is nothing but dried fenugreek leaves. Kasuri methi is one of the most fragrant variety of methi is used for perfuming savory dishes. You can use it in this recipe to make the dough.
Ingredients
Other than methi, you need the following ingredients for this recipe.
- Maida or Plain/All purpose flour
- Whole Wheat Flour (Atta)- Atta is different from whole wheat flour available in grocery aisle. Atta is fine ground.
- Semolina (Suji/Sooji)- A few tablespoons of sooji (semolina) not only make the pooris crisp but also help in making the dough not too soggy. When methi and salt are combined in the dough- the leaves release moisture, semolina gets to work and absorbs it!
- Garlic- Grated
- Spices - Red chill Powder, Turmeric Powder, Cumin Powder, Ajwain (carom seeds)
- Oil - for frying

How to Make Methi Puri
Make The Dough
- In a large mixing bowl, sift the plain flour and whole wheat flour. Add the semolina.
- Add the garlic, chopped methi, cilantro and all the spices. Using your hands, mix everything so that everything is evenly distributed.
- Add the oil and incorporate in the flour mixture.
- Add salt, mix and start adding water little by little. We want to make a stiff dough but it should not be dry. I used about 5 tablespoons of water to get a firm soft dough, you might need less or more depending on the quality of your flour. Also keep in mind that due to salt in the dough, the methi leaves and cilantro will release water so the dough will get a bit soft as it rests.
- Keep adding water and kneading the puri dough, pressing down using your knuckles, gathering it again by folding it over itself and kneading again. It will take about 5-7 minutes of kneading to get a smooth dough. Make into a smooth ball and place in in a container and cover with a lid. Do not leave the dough to rest without covering it. Let the dough rest for ablest 15-20 minutes.


Deep Frying Methi Puris
- Set oil for deep frying to heat up in a deep kadai or pot. Pinch 10 equal and roll between your palms to make lime sized balls. Flatten down the dough ball on your work surface, (don't add any dry flour) and using a rolling pin roll into a 3 inch or 4 inch circle. Repeat for all the portions and keep the pooris covered with a dry cloth. You can use a little bit of oil if you need when rolling.
- To test the oil, pinch a little portion of the dough and add it to the oil. If it comes up sizzling, oil is too hot, and if it settles to bottom, oil is cold. The dough should rise up quickly (without sizzling).Thats when its at the right temperature.
- Slide rolled puris one by one in the medium hot oil. Fry in small batches. Once you add to oil, in 2-4 seconds start pressing down gently with a slotted spoon. This will help in puffing the puris. Keep in mind that these won't puff a lot since the dough is loaded.
- Flip and fry on second side for 6-8 seconds. You should be able to see that the color is light brown. Fry longer if you like extra brown pooris. Lift out of the oil using a slotted spoon and place on a paper towel to remove excess oil. Repeat for all the puris.
- Serve right away or you can store them for 24-48 hours in a container at room temperature.
Making Extra Crispy Methi Puri For Snacking
- Make the dough as outlined in the recipe.
- Make smaller puris. I would say 2 inch circle. You can also roll the dough into a large circle and then use round cookie cutter to cut out small discs.
- Once the puris are rolled, take a fork and run it all over the puri. This makes sure that the puris wont puff up and they crisp up well too.
- Fry the pooris on low medium heat for long. You should be able to see the dough turn golden brown. Low heat is important for crispy puris.
Some Tips
- When making pooris with fresh methi, chop the methi as fine as you can using a knife. Avoid chopping stems of methi, just use the leaves.
- Dont use food processor since it can make the methi too fine and once kneaded with flour, salt and spices, methi will release its juices can discolor the dough or lend a bitter taste.
- You may add 1 tablespoon of kasuri methi to the dough if you cannot find fresh methi.
- When you make the dough, make a tight dough to start with. The dough will soften as it rests since methi will realease its moisture due to salt.
- Dont skip resting the dough. Rest it for 15-20minutes. Resting helps in mingling of flavors as well as the texture of pooris.
- Since there is garlic and chopped methi in the dough, avoid rolling the puris too thin. These puris cook and taste better when they are little thick.
Serving
Serve methi puris as a snack with cup of hot chai and a lime or garlic pickle.
I love serving them with malai aloo curry and kaddu sabzi for a full meal.

Methi Puri (Fresh Methi Poori)
Ingredients
- ½ cup all purpose flour maida
- ½ cup whole wheat flour atta
- 3 tablespoon fine semolina suji
- 1.5 tablespoon garlic grated or minced
- ½ cup methi finely chopped
- 2 tablespoon cilantro finely chopped
- Pinch asafetida hing
- ½ teaspoon carrom seeds ajwain
- ½ teaspoon cumin powder
- ¾ teaspoon red chilli powder or cayenne, adjust to taste
- ½ teaspoon turmeric powder
- ½ teaspoon salt
- 2 tablespoon oil
- 5-6 tablespoon water for kneading
- Oil for frying
Instructions
- In a wide and large mixing bowl or shallow plate, sift the maida and atta. Add the semolina.
- Add the garlic, chopped methi, cilantro and all the spices. Using your hands, mix everything so that everything is evenly distributed.
- Add the oil and incorporate in the flour mixture.
- Add salt, mix and start adding water little by little. We want to make a tight but not a dry dough. I used about 5 tablespoons of water to get a firm dough, you might need less or more depending on the quality of your flour. Also keep in mind that due to salt in the dough, the methi leaves and cilantro will release water so the dough will get a bit soft as it rests.
- Keep adding water and kneading the dough, pressing down using your knuckles, gathering it again by folding it over itself and kneading again. It will take about 5-7 minutes of kneading to get a firm dough. Make into a smooth ball and place in in a container and cover with a lid. Do not leave the dough to rest without covering it. Let the dough rest for ablest 15-20 minutes.
- Set oil to heat up in a deep kadai or pot. Pinch 10 equal sized portions of the dough and roll between your palms to make lime sized balls. Flatten the balls down on your work surface, (dont add any dry flour) and using a rolling pin roll into a 3 inch or 4 inch circles. Repeat for all the portions and keep the pooris covered with a dry cloth. You can use a little bit of oil if you need when rolling.
- To test the oil, pinch a little portion of the dough and add it to the oil. If it comes up sizzling, oil is too hot, and if it settles to bottom, oil is cold. The dough should rise up quickly (without sizzling).Thats when its at the right temperature.
- Slide rolled puris one by one in the hot oil. Once you add to oil, in 2-4 seconds start pressing down gently with a slotted spoon. This will help in puffing the puris. Keep in mind that these won't puff a lot since the dough is loaded.
- Flip and fry on second side for 6-8 seconds. You should be able to see that the color is light brown. Fry longer if you like extra brown pooris. Lift out of the oil using a slotted spoon and drain on a paper towel. Repeat for all the puris.
- Serve right away or you can store them for 24-48 hours in a container at room temperature.Enjoy!


Meenu says
perfect for upcoming festive season ...