

Indian-style chicken tikka kebabs, also known as tandoori chicken tikka or murgh tikka, are tender pieces of chicken marinated in yogurt, fresh aromatics, herbs, and warming spices. Traditionally, the marinated chicken is threaded onto skewers and cooked in the intense heat of a tandoor until smoky and beautifully charred around the edges.
The good news is that you don't need a tandoor to recreate those flavors at home! You can make delicious chicken tikka in the air fryer, oven, or right on the stovetop. I've included instructions for all three methods for this an easy recipe for weeknight dinners, entertaining, or meal prep.

Come summer and we love to make a lot of tikka and kebab recipes. I usually prep a few different marinades at the beginning of the week, which makes putting together meals so much easier.
And before we delve into the recipe, let me clear up a common confusion. So, chicken tikka and chicken tikka masala are not the same thing. Chicken tikka is the grilled chicken. Chicken tikka masala takes those cooked pieces and simmers them in a rich, creamy tomato-based curry. I'll share my version of that soon!
Chicken Tikka Marinade
At the heart of a good chicken tikka is a really flavorful tandoori marinade. When I first started making tikka at home, I often felt like my marinade was missing something.
Over the years, after many batches and plenty of tweaking, I've learned that a few small details can make a huge difference. Here are my best tips for getting it right every time:
- Whole and mildly tangy dahi (yogurt) - Though you can use skimmed milk yougrt, full-fat yogurt adds a wonderful richness and keeps the chicken tender. More importantly, yogurt should not be watery, otherwise the marinade won't cling well to the chicken. In India, hung curd is traditionally used for tikka marinades.
- Good quality ground spices - They make all the difference! I won't use spices that are more than 3 months old on my pantry shelf. See that vibrant color on the tikka marinade? No artificial food coloring needed! It's all thanks to the perfect mix of Kashmiri red chili powder and bit of turmeric powder. Pretty impressive, right?
- Use oil in the marinade- I always use mustard oil in my marinades. It brings that distinctive, slightly smoky flavor that is hard to recreate with a neutral oil. If you don't have mustard oil, melted ghee is a good second choice and it adds its own lovely nutty richness. I wouldn't reach for a neutral oil here because we want the fat to contribute flavor. Skip butter since it can burn easily in the high heat.
- Marinate the marinade - That's my little secret: After preparing the marinade, I let it rest for 1-2 hours if time permits. This allows aromatic ingredients to meld together, and the flavor is enhanced significantly!
- Two Rounds of Marination - The first marination is really simple. I rub the chicken with lemon juice, ginger, and garlic. This immediately starts tenderizing the meat while also getting rid of any raw chicken smell. The second marination is where all the flavor comes in. Once the chicken is left to marinate for several hours, the flavors really soak in while tenderizing the meat further.
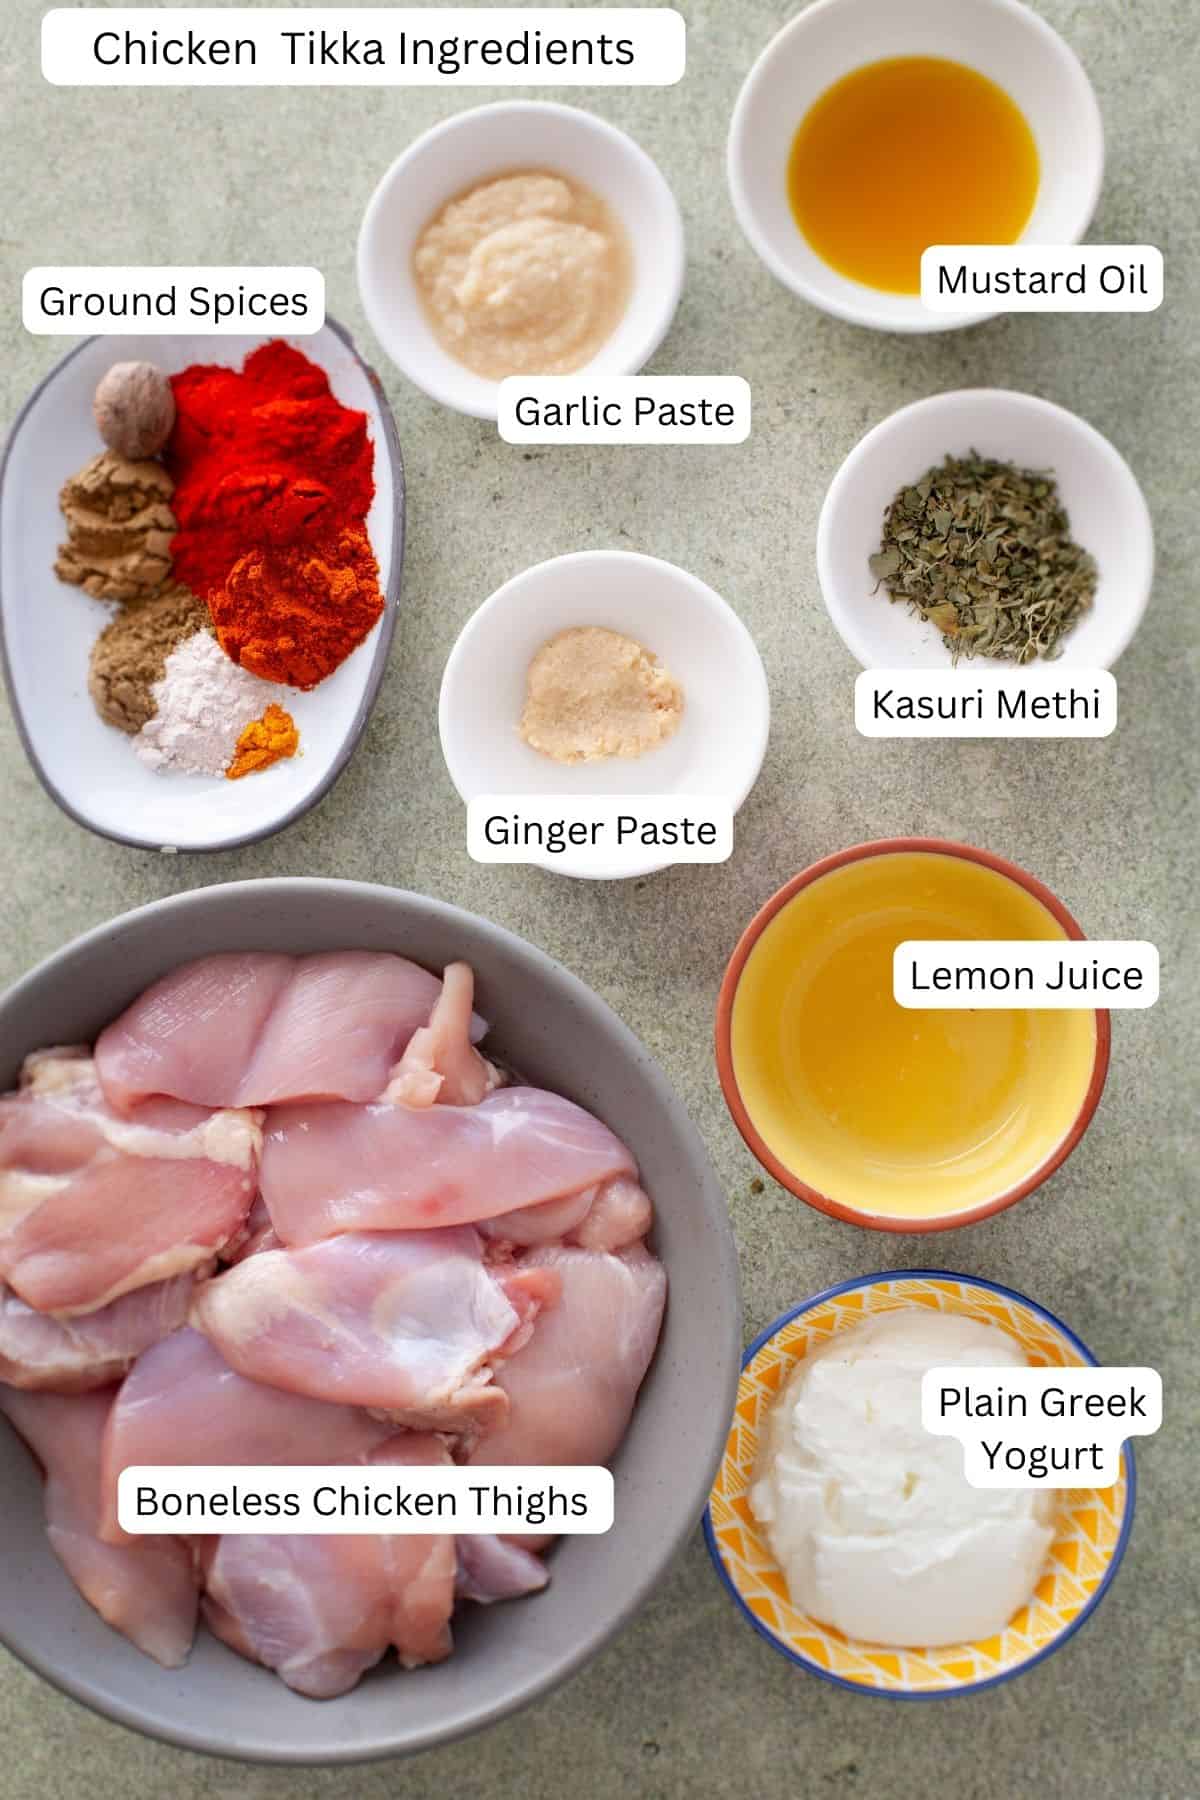
Which cut of Chicken to Use
- I prefer chicken thighs. We love dark meat, and I use boneless, skinless chicken thighs for most of my chicken recipes, including tikka. They have more flavor, stay wonderfully juicy over high heat, and are much more forgiving, especially when cooking over an outdoor grill. If you prefer chicken breast, that works too.
- Keep the chicken pieces chunky.Cut the chicken into roughly 2 to 2½-inch pieces. The meat shrinks quite a bit as it cooks, so starting with larger chunks helps the tikka stay juicy and succulent instead of drying out.
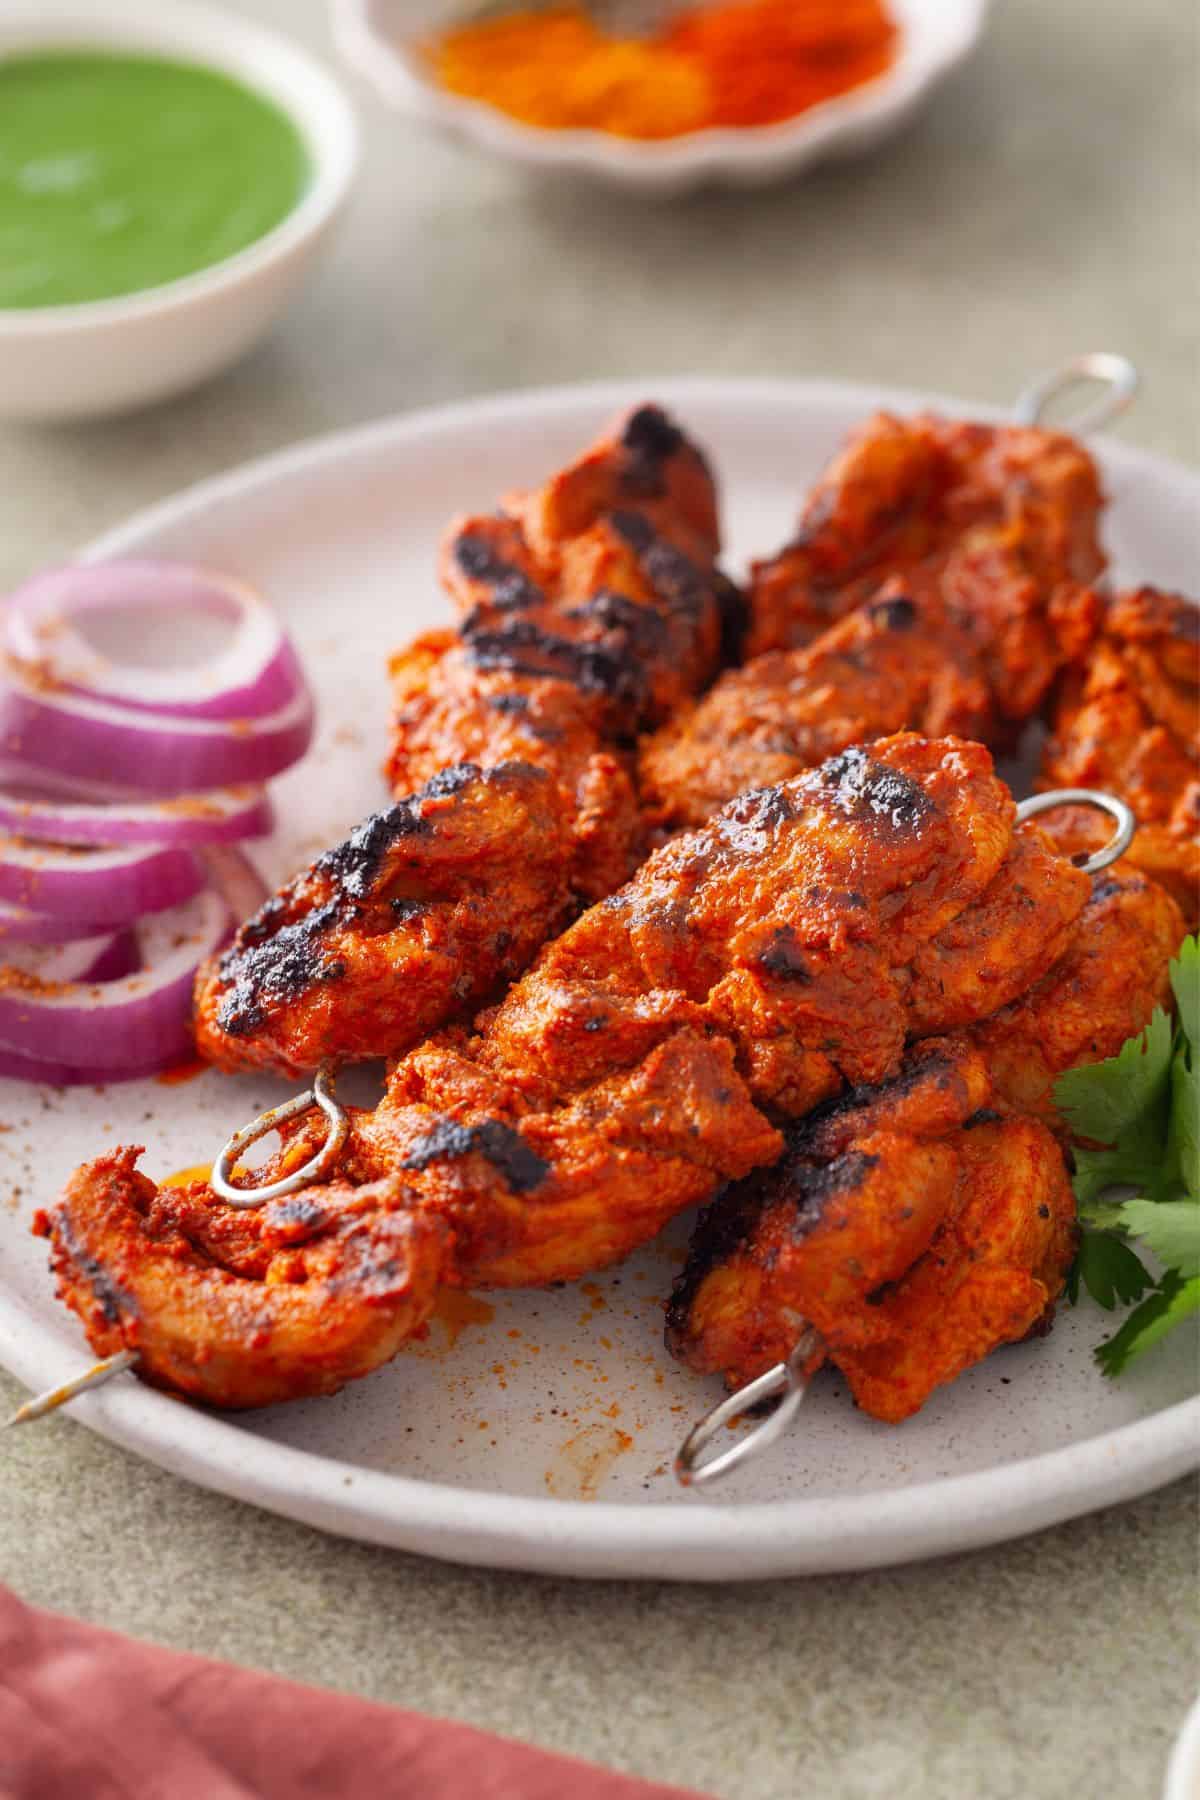
How To Make Tandoori Chicken Tikka
First Marination
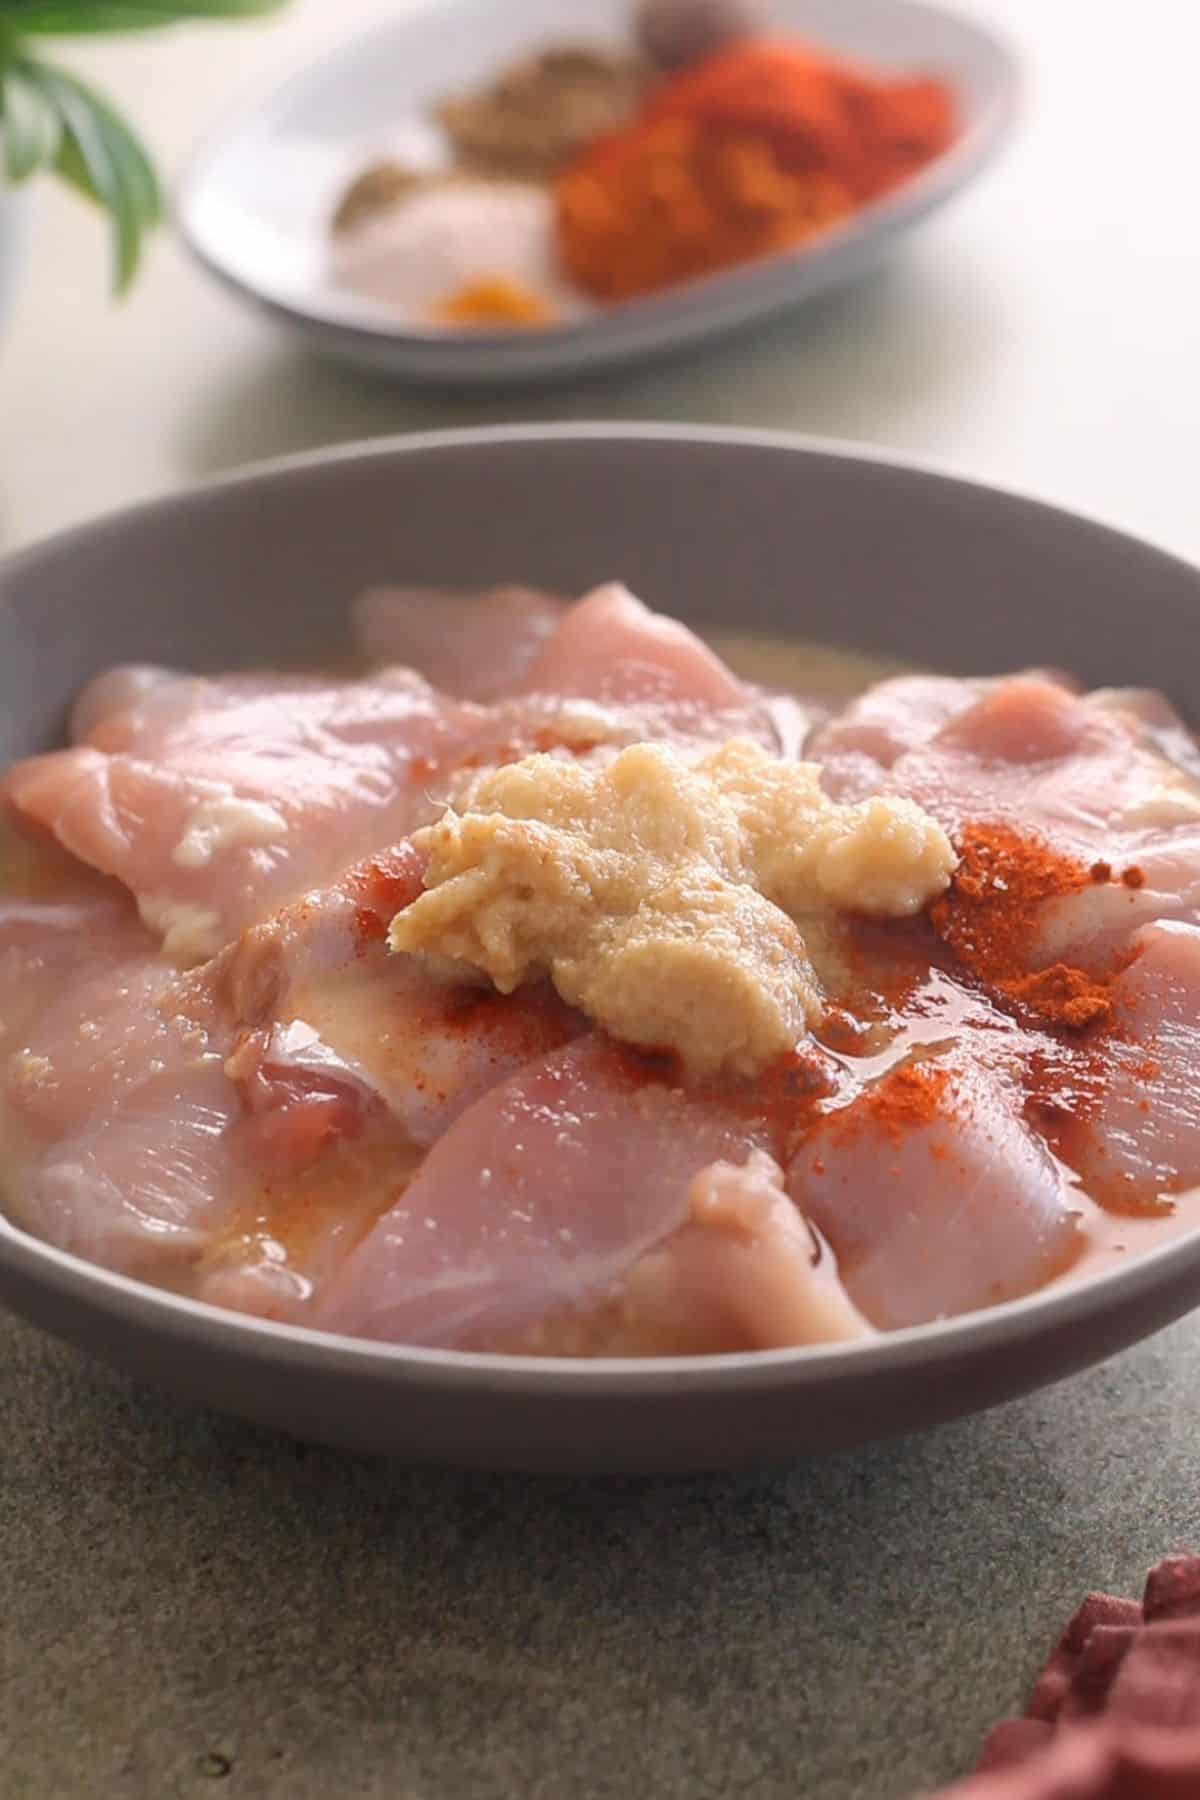
- In a large bowl, add the chicken pieces. Add lemon juice, garlic & ginger paste, salt and red chili powder.
- Using hands (wear food safe gloves!) toss well so that the chicken is coated nicely.Cover and leave to marinate, refrigerated, for 30-45 minutes.
Prepare the Tandoori Marinade
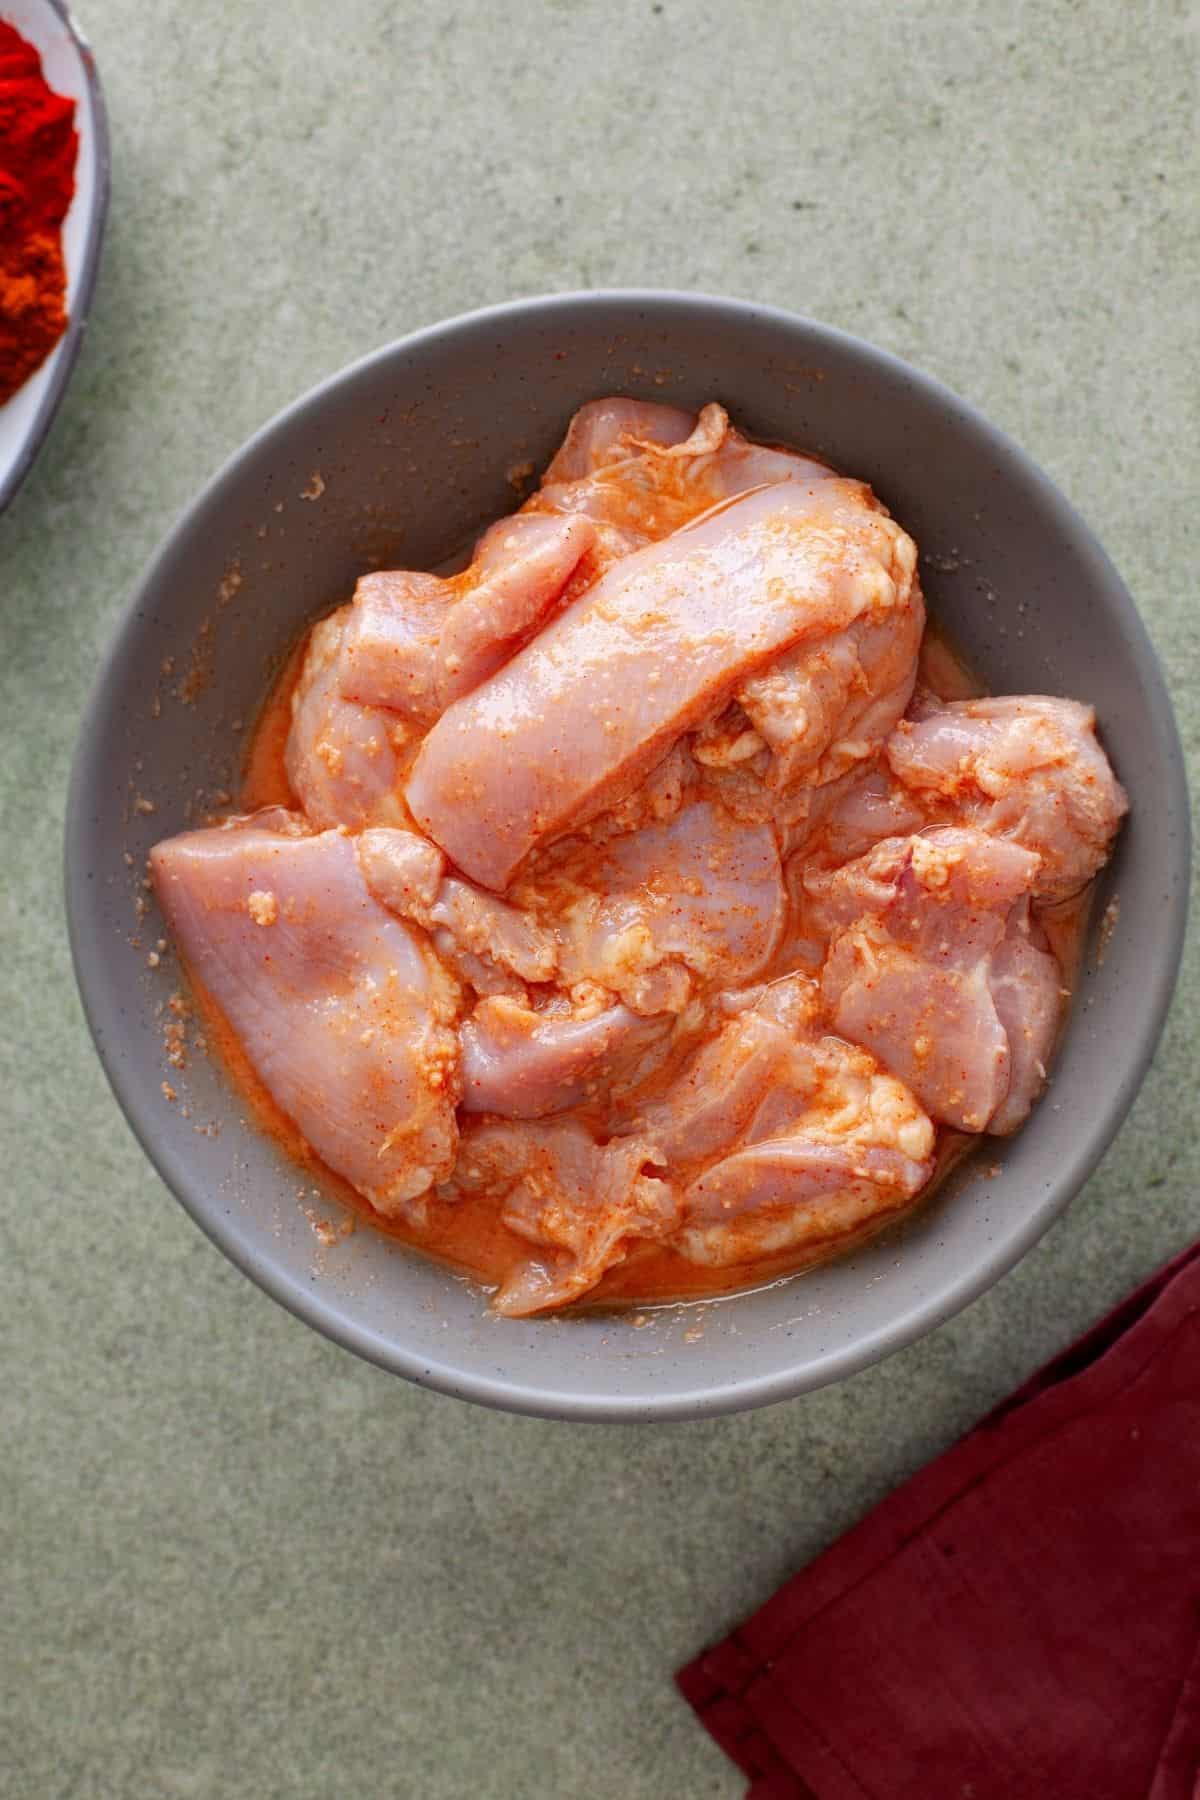
- In another large mixing bowl, whisk together yogurt with the aromatics and ground spices, mustard oil and salt.
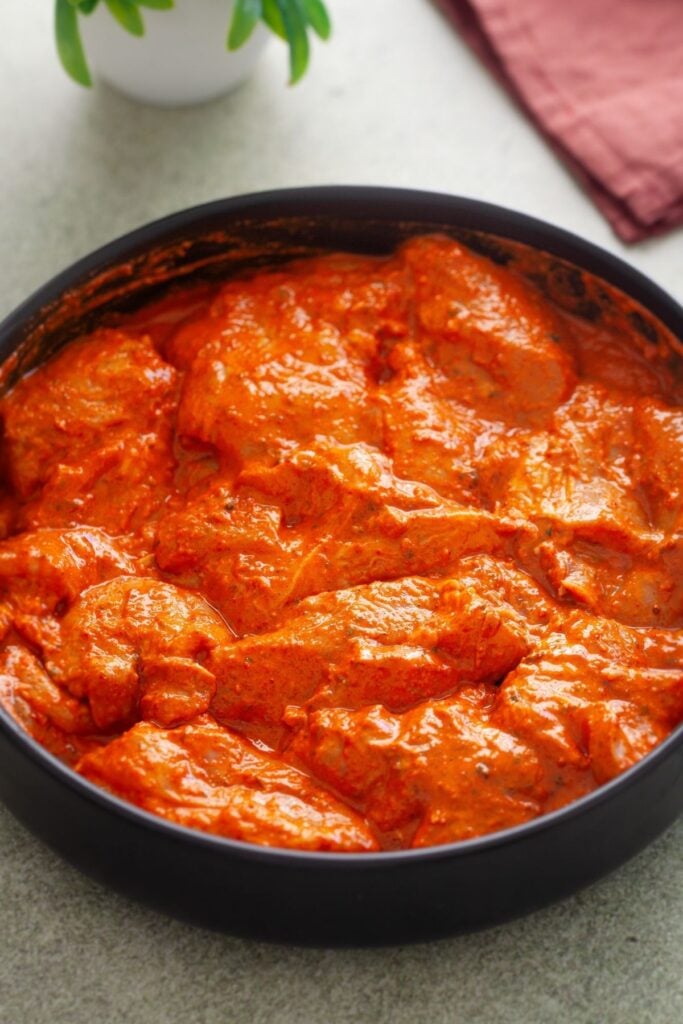
- After the first marination, drain any excess liquid collected at the bottom of the chicken bowl. Add the chicken to the marinade and toss gently with your hands, so that every piece is generously and evenly coated.
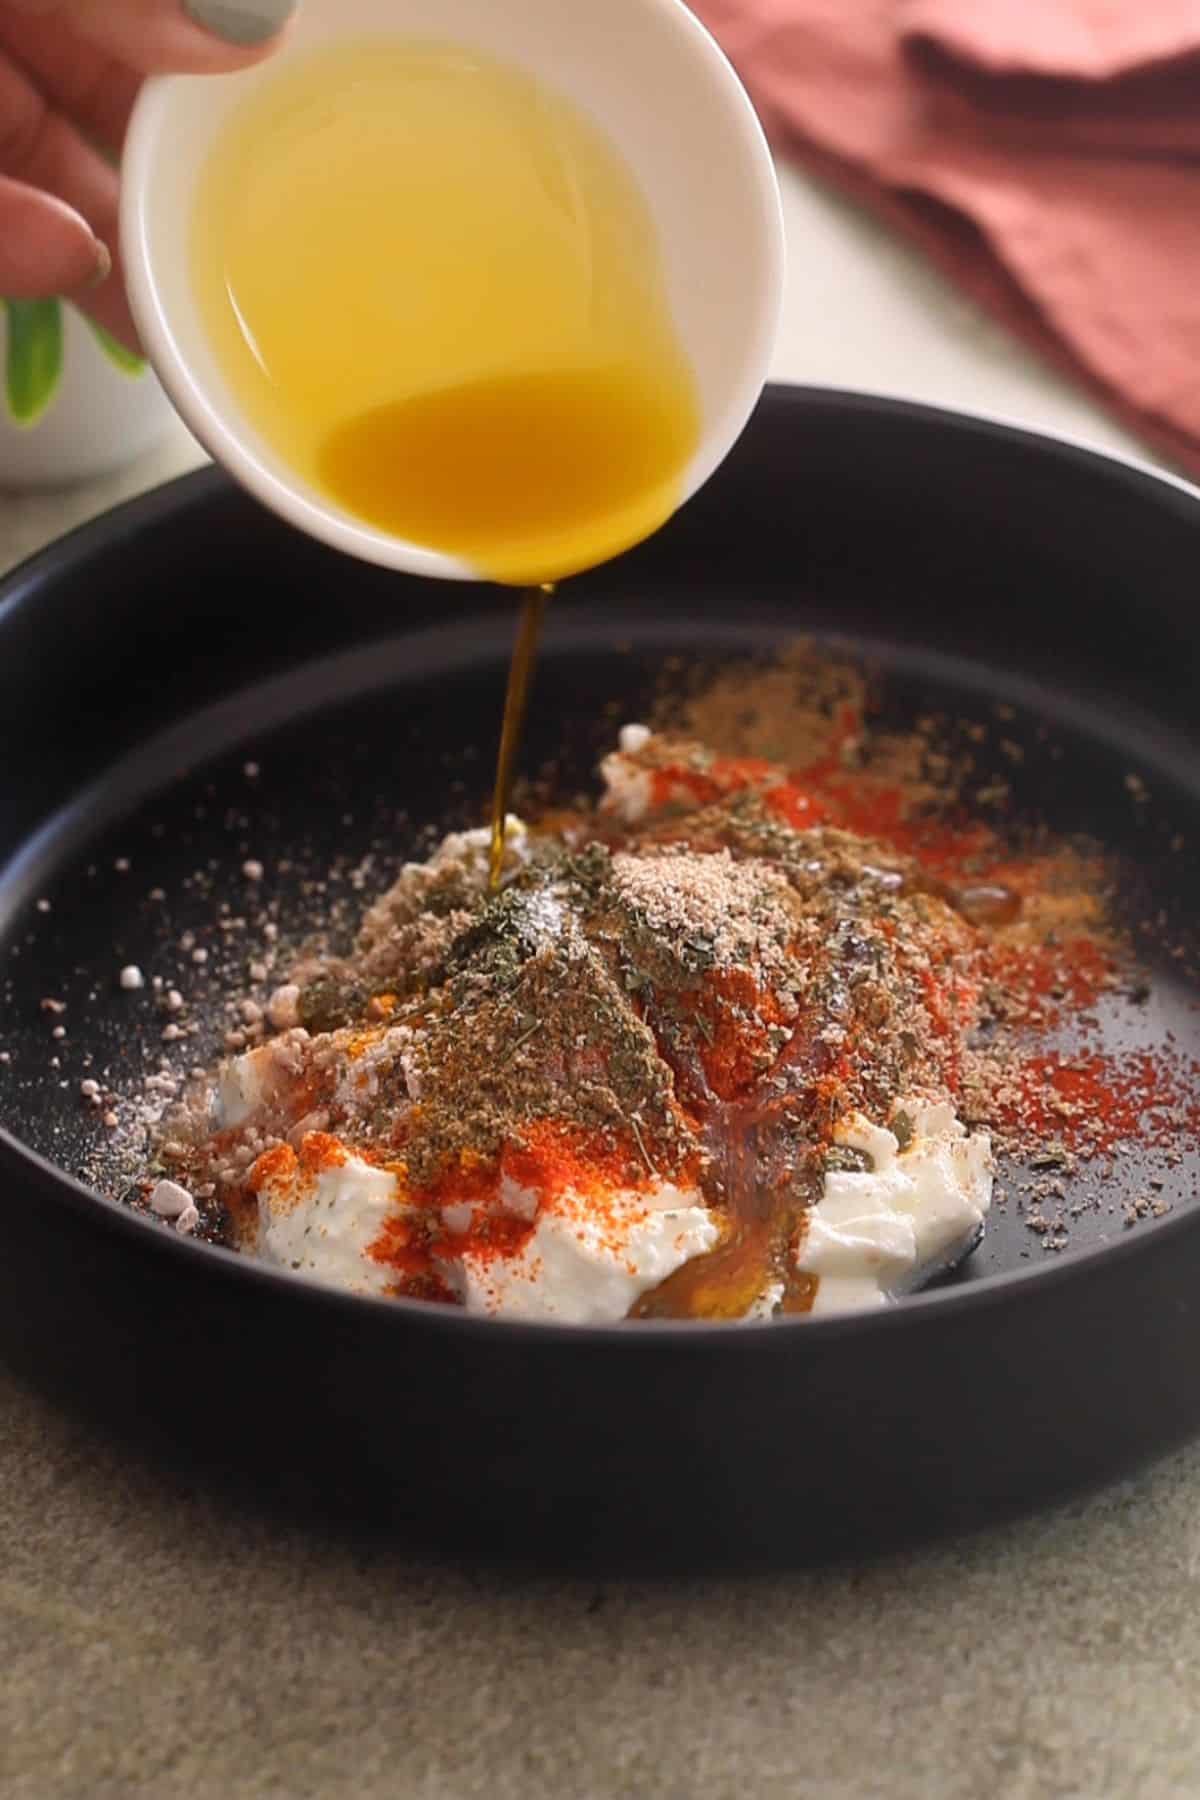
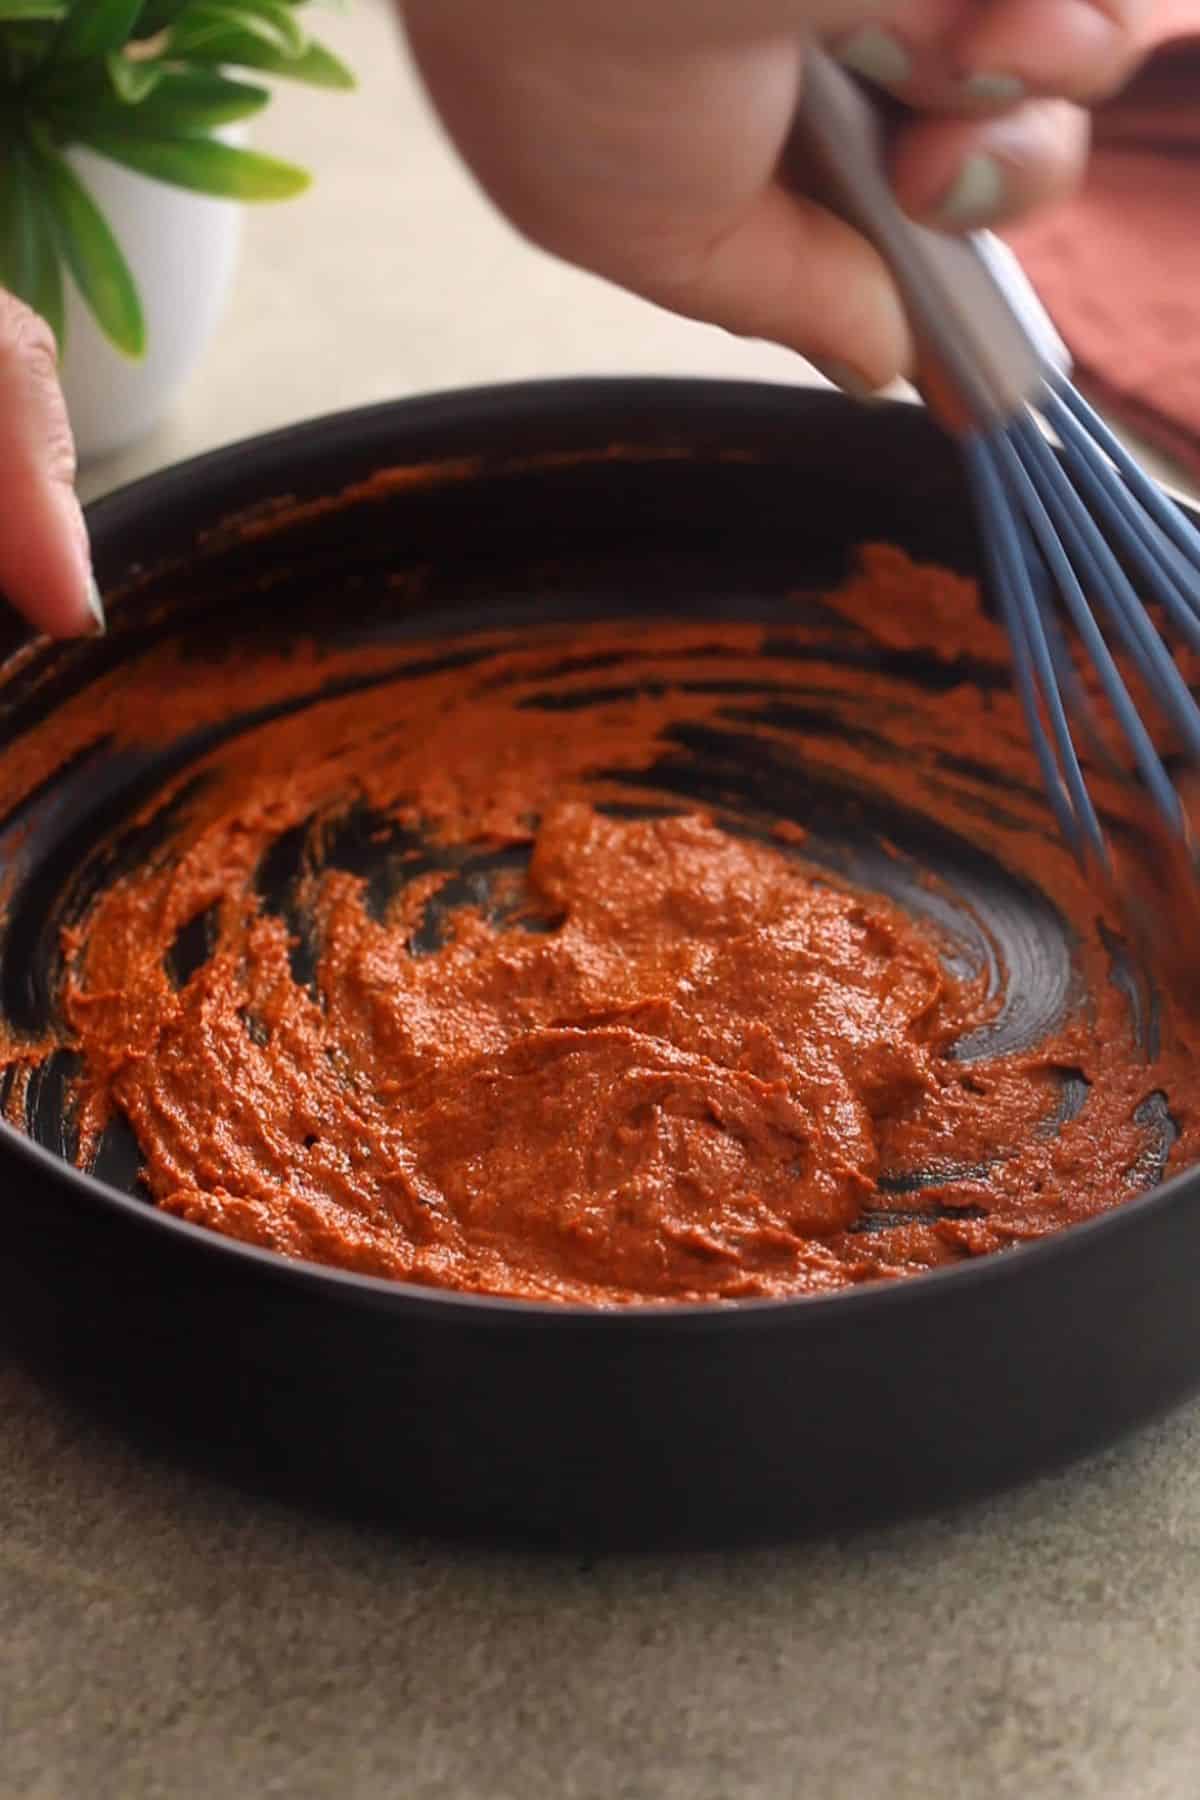
- Cover and leave the chicken to marinate, refrigerated for at least 8 hours (the longer you marinate, the better the taste). I marinate it for up to 2 to 3 days sometimes.
Smoke The Tikka
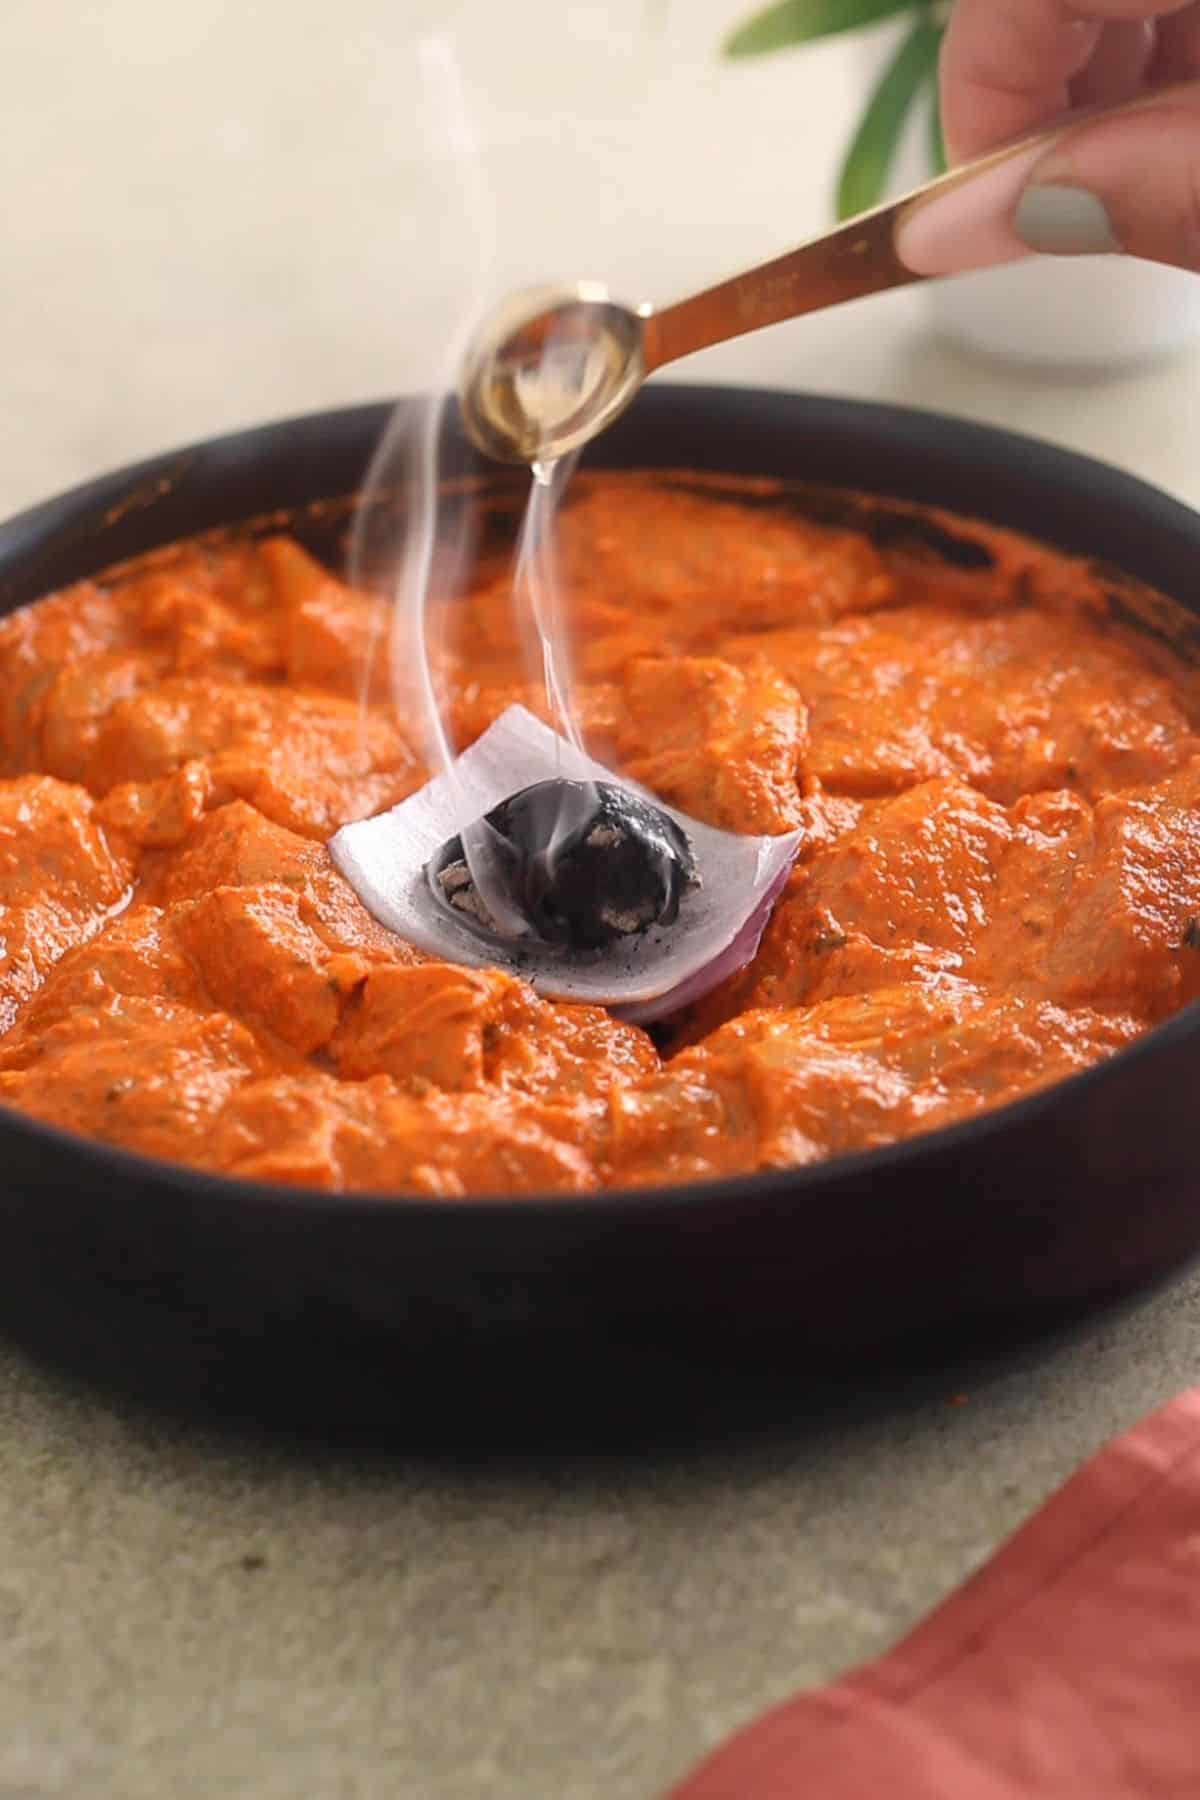
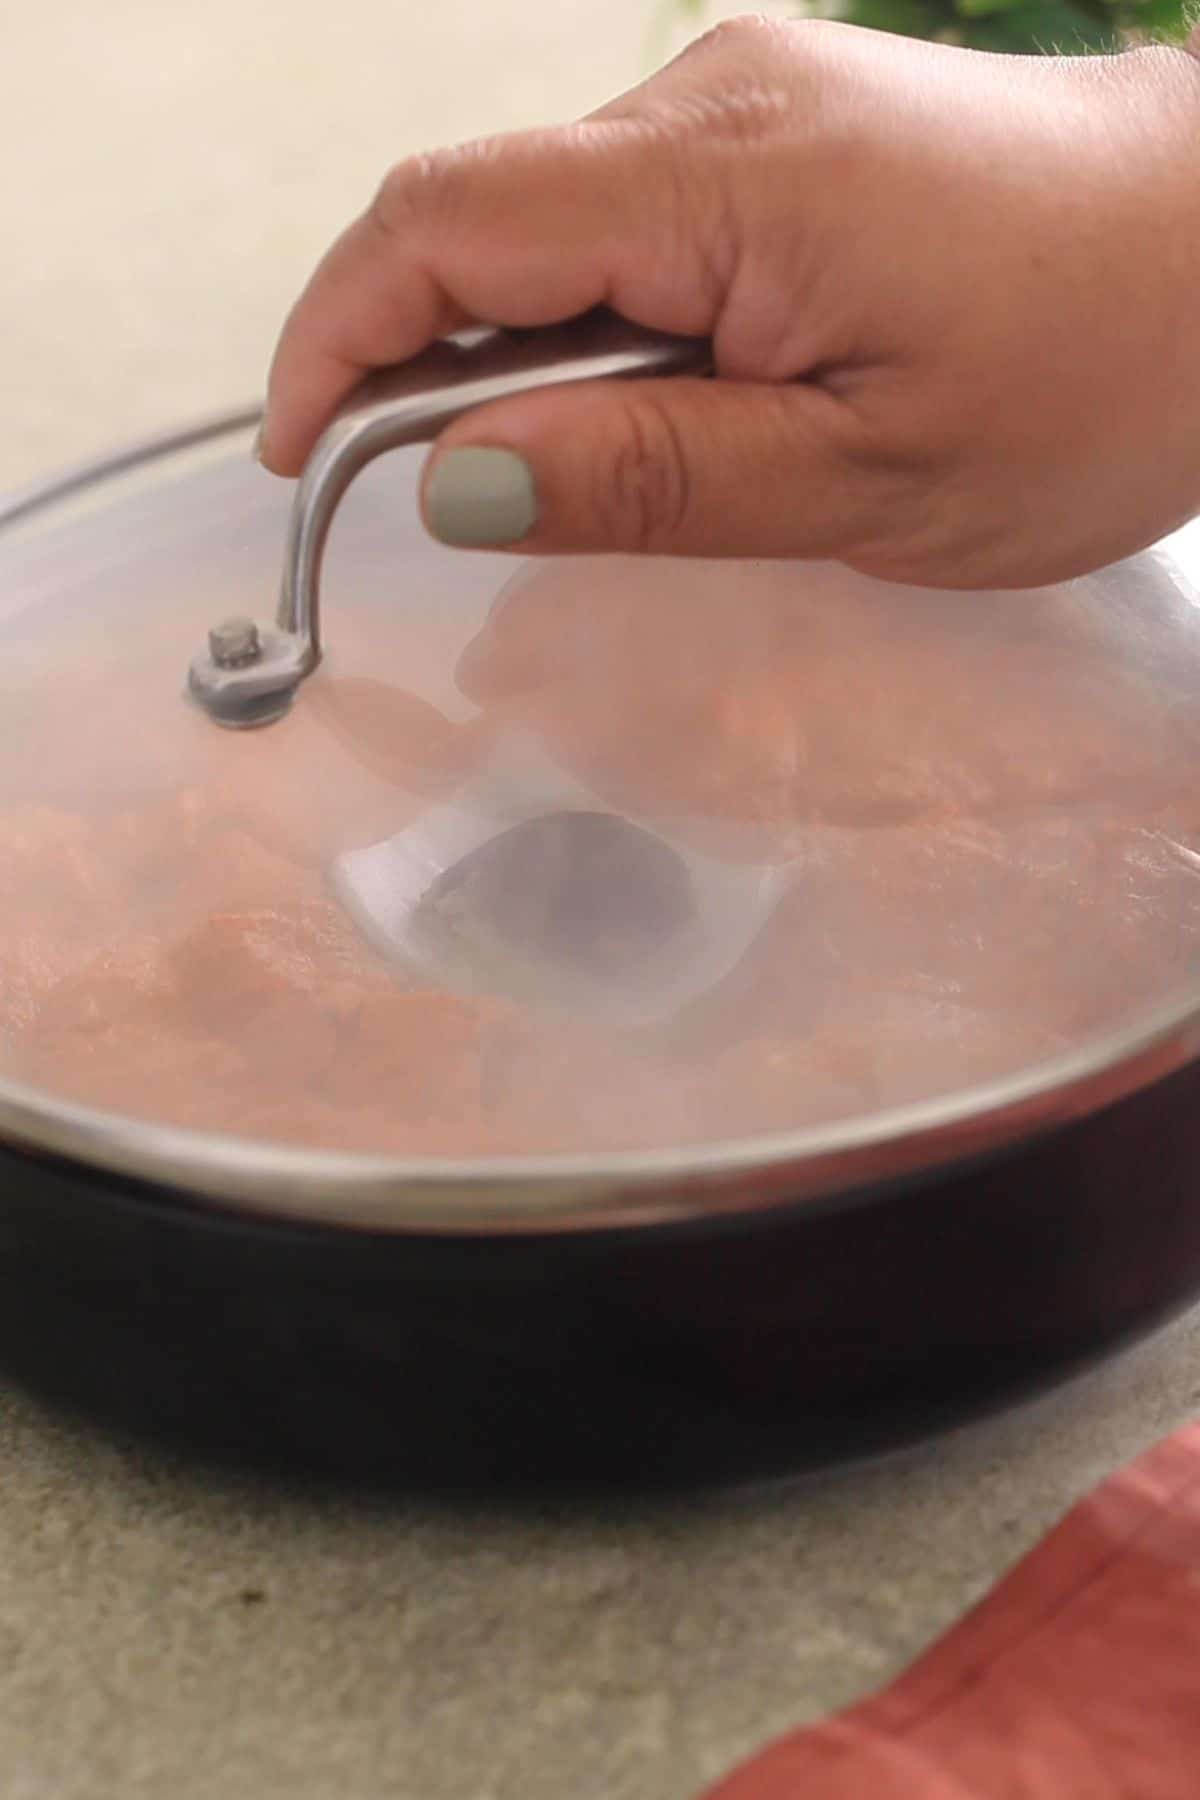
This is an optional step. For enhanced smokiness, you could give dhungar to the marinated chicken. Simply place a small bowl or an onion petal over the chicken and place a burning piece of charcaol over it.
Drizzle 1-2 drops of melted ghee and cover the bowl immediately to trap the smoke. Let smoke for maximum of 1-2 minutes else the smokiness may get unpleasantly overpowering. Do this step right before proceeding to cook the chicken tikka.
Cook Chicken Tikka
Take the marinated chicken out of the refrigerator 1 hour prior to cooking. Thread the chicken on to metal skewers. If you are using bamboo skewers or wooden skewers, soak them for 30-40 minutes in water, pat dry and then thread the chicken tikka on them.
Use any one of the below methods to cook the chicken tikka on high heat. I like to cook chicken tikka on stove top or the air fryer.
Chicken Tikka on Stove Top
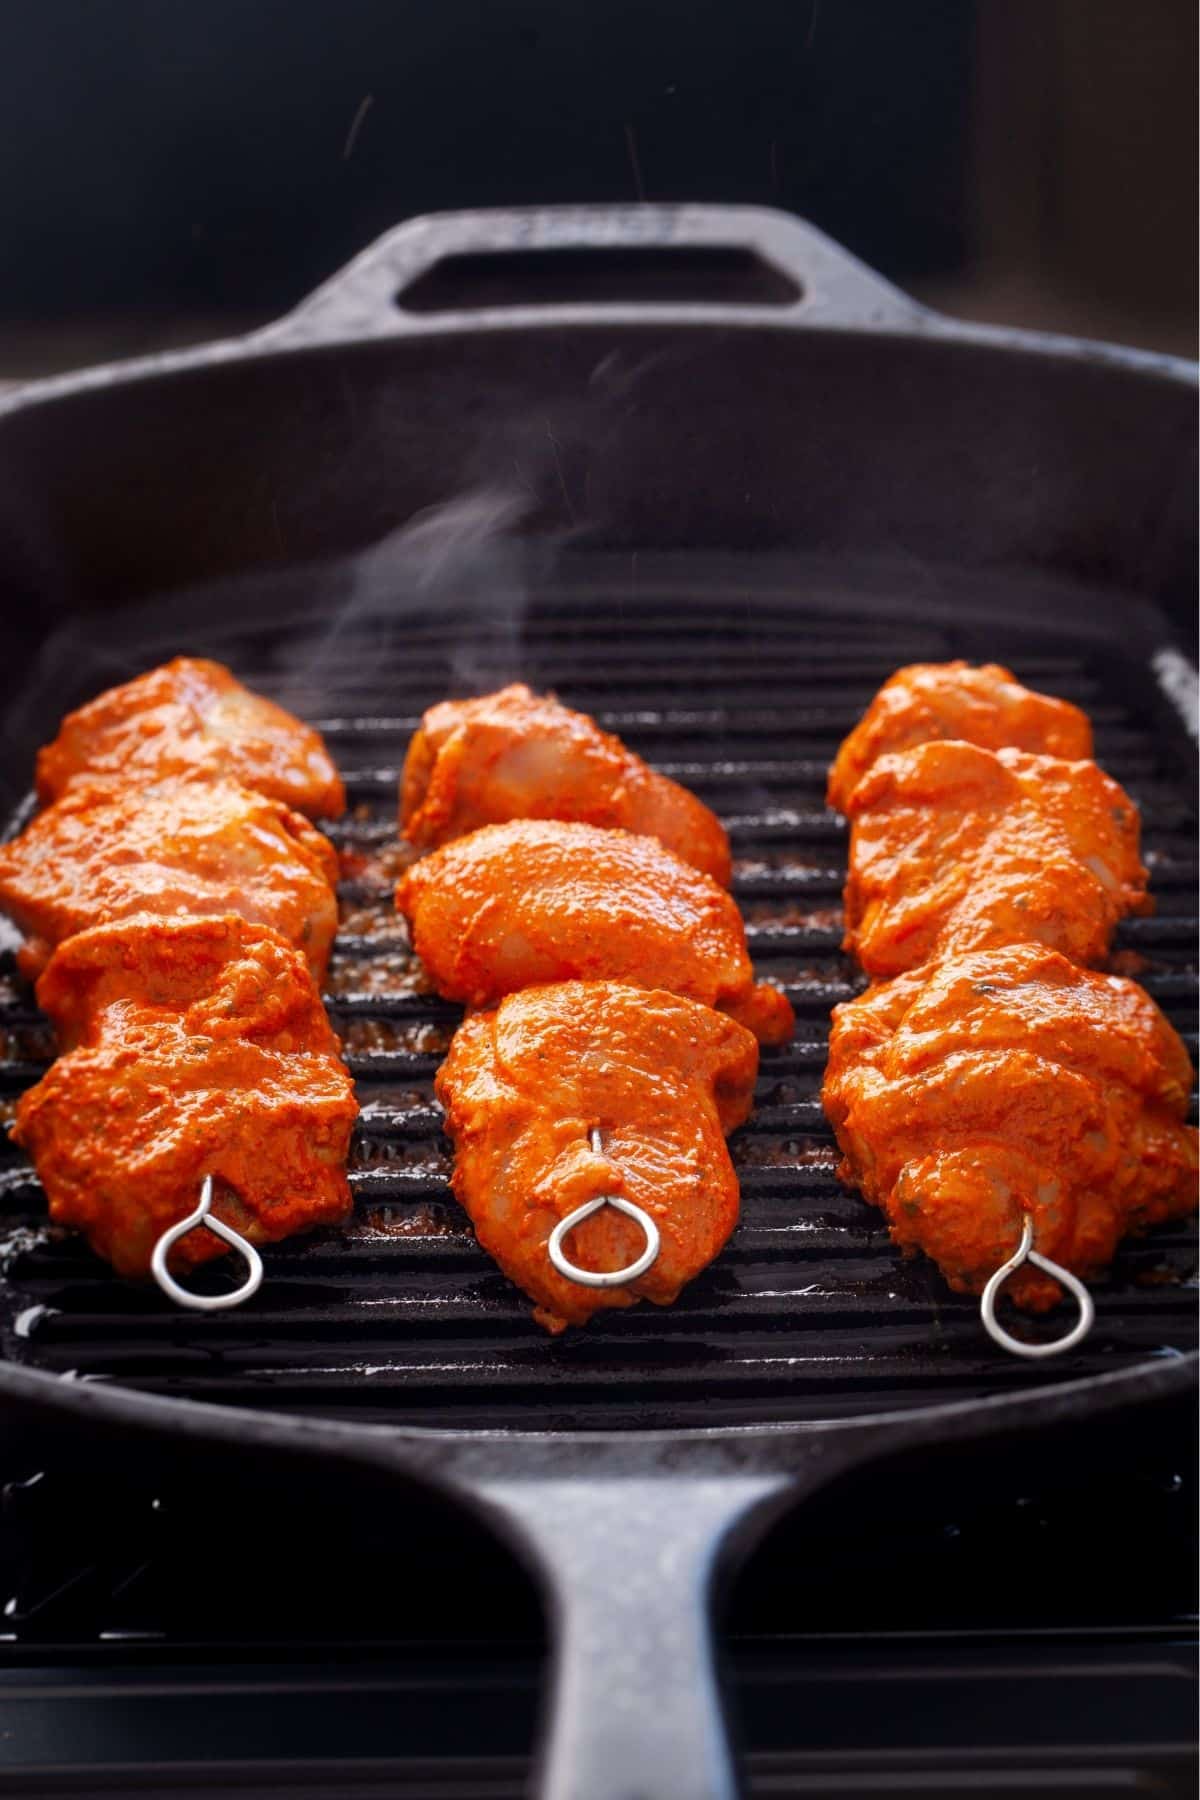
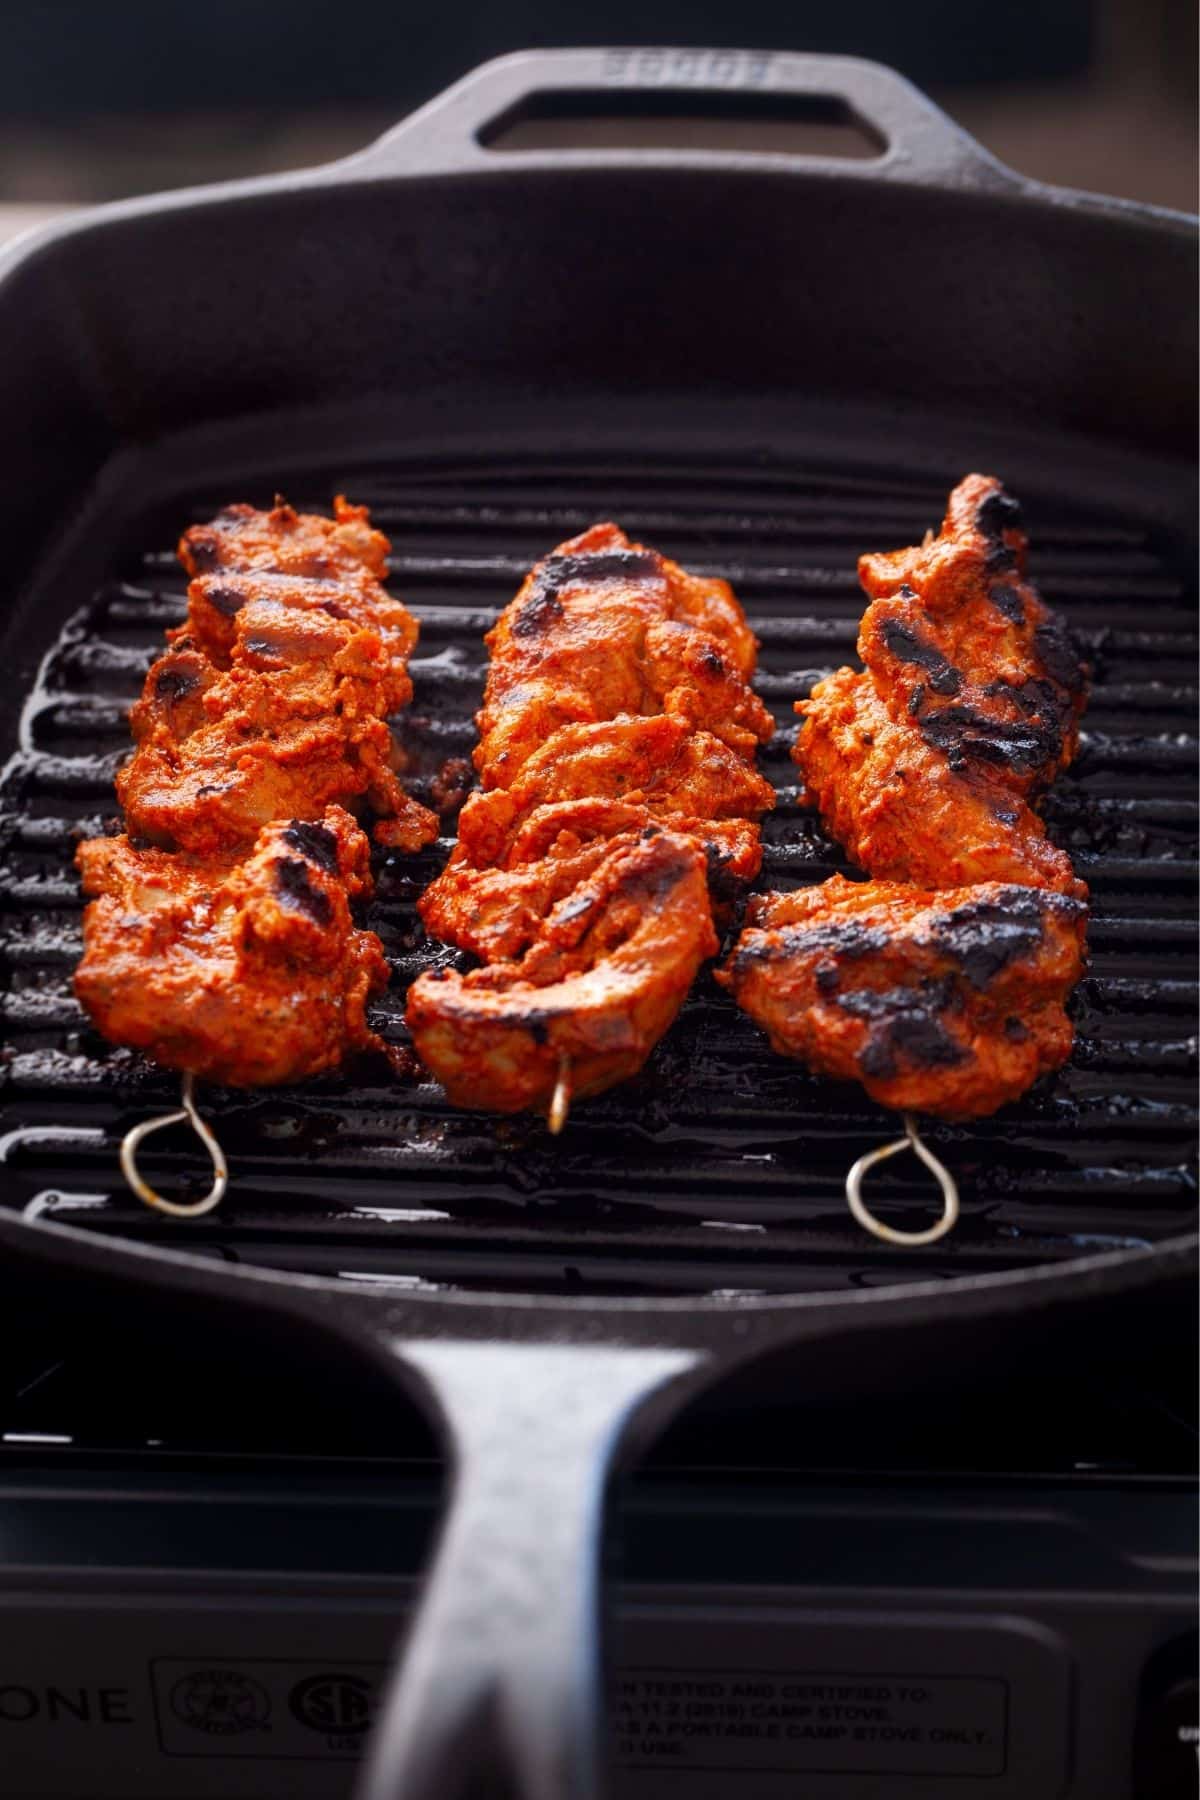
I prefer using cast iron grill pan. You could use a normal cast iron pan or a non stick pan works fine too. Let the grill pan heat up on high flame. Spray the grill pan liberally with oil or ghee. Place the chicken skewers in a single layer on the pan. You will hear a sear sound! Let the chicken cook for 5-7 minutes and then carefully, using tongs, flip to cook on other side for 3-4 minutes.
Rotate the chicken skewers briefly on all other sides to cook very well. Don't be shy to spray oil or brush melted ghee on tikka as needed while cooking. Once the tikka are ready, brush with melted butter and sprinkle chaat masala right away.
Tip - Don't skimp on oil while making chicken tikka. Oil helps keep the tikka moist and prevents sticking as well.
Chicken Tikka in The Air Fryer
If you are using air fryer, no need to use skewers. Simply layer the marinated tikka on the air fryer basket(use paper liners for easy cleaning). Air fry the chicken tikka at 450F for about 10-13 minutes in total, flipping them mid way for even cooking. Once the tikka are ready, brush with butter and sprinkle chaat masala right before serving.
Oven Chicken Tikka
Preheat oven to 450F. Line your baking sheet with aluminum foil or parchment paper(this helps cleaning). Place the chicken tikka skewers such that the skewers rest on the edges of the baking sheet(choose the size of baking tray accordingly). This placement makes for a crisper chicken tikka.
Spray or brush chicked cubes with oil. Bake the chicken tikka for 10-12 minutes. Open the oven door, pull out of the baking sheet out of the oven. Using tongs flip the skewers and spray again with oil. Bake for another 9-10 minutes or until the chicken tikka have browned edges. If you prefer extra charred tikka, place under a broiler for 1-2 minutes.
More Tips
- If you prefer, you could skewer vegetables like bell peppers, onions, zucchini or cherry tomatoes with the chicken tikka. Cut the vegetables thick and large in size so that they don't overcook while chicken tikka is finishing cooking.
- If you feel that your marinade has become runny, add 1-2 teaspoon of dry roasted besan (gram flour) or little bit of cornstarch to thicken it.
- For a "yellowish" looking chicken tikka, reduce the quantity of kashmiri chilli powder and use ¼ teaspoon turmeric.
- The cooking times I have mentioned above are for tikka using chicken thighs. Adjust the cooking time if you are using chicken breast. Chicken breast tikka will cook quickly.

Authentic Chicken Tikka Kebab (Murgh Tikka)
Save The Recipe!
Ingredients
- 500 g chicken thighs boneless, skinless, cut in 2-3.5 inch pieces
To Make The First Marinade
- 1 tablespoon lemon juice freshly squeezed
- ½ tablespoon garlic paste store bought is fine
- 1 teaspoon ginger paste
- 1 teaspoon red chilli powder hot , adjust to taste, use cayenne powder instead
- ½ teaspoon salt
Second Marinade Ingredients
- ⅓ cup (90g) plain yogurt or hung curd, use whole milk thick yogurt
- 1 tablespoon kashmiri chilli powder or use paprika powder
- ½ teaspoon garam masala powder
- ¼ teaspoon cumin powder
- ¼ teaspoon turmeric powder
- ½ teaspoon kala namak (indian black salt), skip if not available
- ½ teaspoon chaat masala
- 1 teaspoon salt adjust to taste
- 1 teaspoon kasuri methi crush dried fenugreek leaves between palms to activate its aroma & flavor
- ⅛ teaspoon nutmeg freshly grated, optional
- ½ tablespoon mustard oil or use melted ghee
To Serve
- Onion rings, cilantro, green chutney etc
- 2 tablespoon butter melted, for brushing (optional)
Instructions
First Marination
- In a large bowl, add the chicken pieces. To the chicken add lemon juice or lime juice, garlic paste, ginger paste, salt and red chili powder.
- Using hands (wear food safe gloves!) mix together so that the chicken is coated very well. Cover and leave to marinate, refrigerated, for 30-45 minutes.
Prepare The Tandoori Marinade
- In another large mixing bowl,add all the ingredients listed under second marinade.
- Using a whisk, mix until smooth. Let the tikka marinade stand or you can refrigerate this tandoori marinade for later use for 3-4 days.Tip - Make sure that the tikka marinade is not too runny else it will slip off the chicken.
Second Marination
- After first marination,drain the excess water if any collected at the bottom of the bowl. Then add the chicken to the tandoori marinade. Add the chicken to the marinade (or vice versa) and use your hands to toss the pieces of chicken in the marinade. Make sure that the chicken is coated very well.
- Cover and leave the chicken to marinate, refrigerated for at least 8 hours (the longer you marinate, the better the taste). I marinate it for up to 2 to 3 days sometimes. This is excellent for meal prep!
Smoke The Tikka (Optional Step)
- Place a small bowl or an onion petal over the chicken and place a burning piece of all natural hardwood charcaol over it. Drizzle 1-2 drops of melted ghee and cover the bowl immediately to trap the smoke. Let smoke for maximum of 1-2 minutes else the smokiness may get unpleasantly overpowering. Do this step right before proceeding to cook the chicken tikka.
Cook The Chicken Tikka (Use any ONE of the below methods)
- Take the marinated chicken out of the refrigerator 1 hour prior to cooking. I like to thread the chicken on to metal skewers. If you are using bamboo skewers or wooden skewers, soak them for 30-40 minutes in water, pat dry and then thread the chicken tikka on them.
- CHICKEN TIKKA ON STOVE TOPLet the grill pan heat up on high flame. Spray the grill pan liberally with oil or ghee. Place the chicken skewers in a single layer on the pan. You will hear a sear sound! Let the chicken cook for 5-7 minutes and then carefully, using tongs, flip to cook on other side for 3-4 minutes. Rotate the chicken skewers briefly on all other sides to cook very well. Spray oil or brush melted ghee on tikka as needed while cooking.Once the tikka are ready, brush with melted butter and sprinkle chaat masala right away.Tip - Don't skimp on oil while making chicken tikka. Oil helps keep the tikka moist and prevents sticking as well.
- CHICKEN TIKKA IN THE AIR FRYERIf you are using air fryer, no need to use skewers. Simply layer the marinated tikka on the air fryer basket(use paper liners for easy cleaning). Air fry the chicken tikka at 450F for about 10-13 minutes in total, flipping them mid way for even cooking. Once the tikka are ready, brush with butter and sprinkle chaat masala right before serving.
- OVEN CHICKEN TIKKAPreheat oven to 450F. Line your baking sheet with aluminum foil or parchment paper(this helps cleaning). Place the chicken tikka skewers such that the skewers rest on the edges of the baking sheet(choose the size of baking tray accordingly). This placement makes for a crisper chicken tikka.Spray or brush chicked cubes with oil. Bake the chicken tikka for 10-12 minutes. Open the oven door, pull out of the baking sheet out of the oven. Using tongs flip the skewers and spray again with oil. Bake for another 9-10 minutes or until the chicken tikka have browned edges. If you prefer extra charred tikka, place under a broiler for 1-2 minutes.
Notes
- If you prefer, you could skewer vegetables like bell peppers, onions, zucchini or cherry tomatoes with the chicken tikka. Cut the vegetables thick and large in size so that they don't overcook while chicken tikka is finishing cooking.
- If you feel that your marinade has become runny, add 1-2 teaspoon of dry roasted besan (gram flour) or little bit of cornstarch to thicken it.
- For a "yellowish" looking chicken tikka, reduce the quantity of kashmiri chilli powder and use ¼ teaspoon turmeric.
- The cooking times I have mentioned above are for tikka using chicken thighs. Adjust the cooking time if you are using chicken breast. Chicken breast tikka will cook quickly.
- Read additonal tips in the blog post.
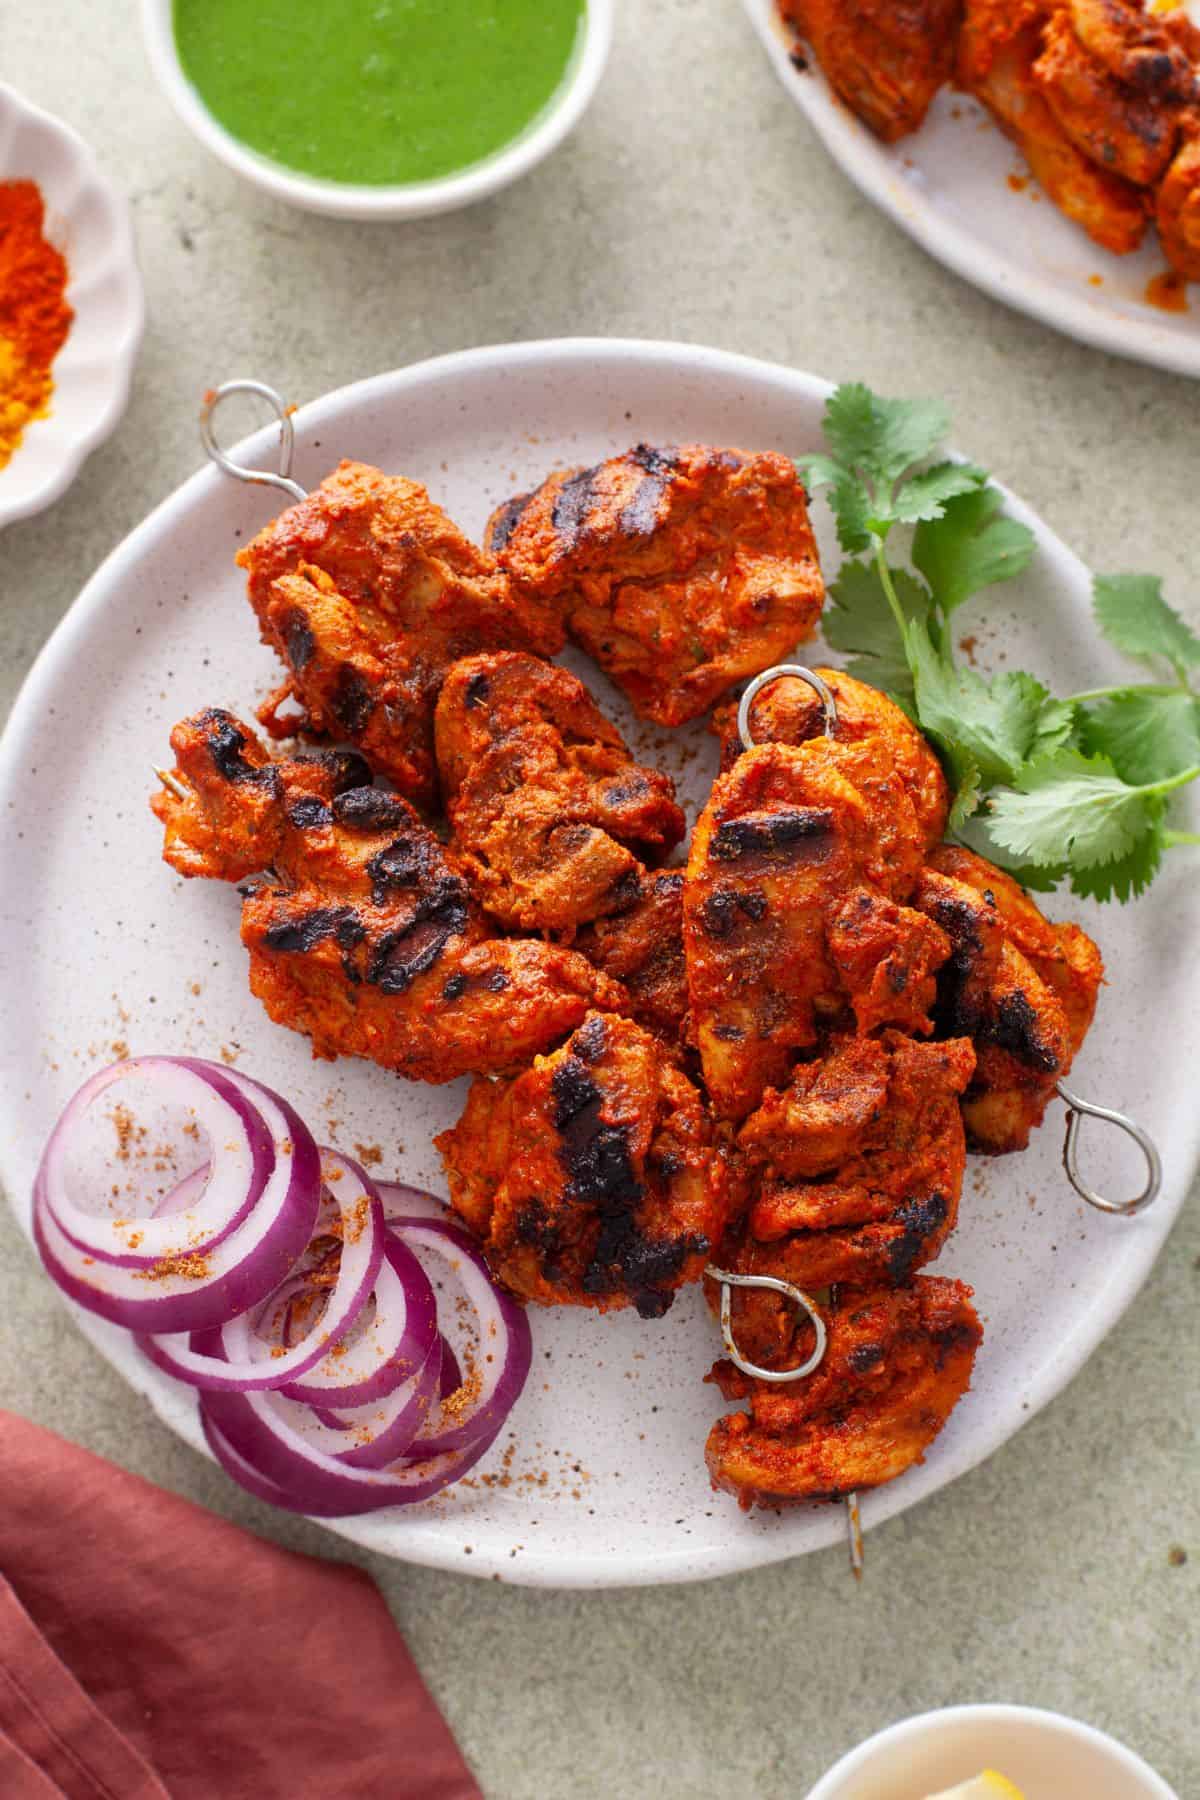
- Traditional Indian way(Restaurant Style) - Serve warm chicken tikka as an appetizer or starter with accompainments such as green chutney(cilantro chutney), sweet tamarind chutney, red onion slices and lemon wedges.
- Make Wraps or Kathi Rolls - Wrap up chicken tikka in indian flatbreads such as paratha or naan along with green chutney, sprinkle of chaat masala and kachumber for a satisfying lunch or snack.
- You could add cut up chicken tikka over pizza base, in salads with greens or to sanwiches(cheesy chicken tikka sandwiches are my favorite) for fun fusion meals.
- Last but not the least, serve chicken tikka for main course with simple pulao such as egg pulao, yakhni pulao or mushroom pulao. If you want to serve with steamed rice or jeera rice, I recommend adding a bowl of raita and mint chutney or cilantro chutney.

getyourexbackkk says
Thanks for this yummy recipe.I tried it last night it came really so yummy and delicious.I must say the way you explain and the images are really help me lot to prepare.
Nidhi Arora says
This looks amazing! Will definitely try, thank you for sharing.
Jenny says
These were delicious and so easy to make!